Friday, November 29, 2013

Olive White Bean Hummus


Happy Belated Thanksgiving! I was buried beneath a mound of potatoes, brussels sprouts, cranberries, and turkey yesterday but I managed to dig my way out to bring you this lovely hummus recipe. It's the perfect snack or light lunch to diversify from the leftover turkey that currently fills my fridge. This is a fairly large recipe, and would also make a lovely appetizer at a party or get-together.


White beans are a fabulous addition to hummus- they're lower in fat than garbanzo beans, and they are super creamy when smashed. The olives add a tangy, slightly salty twist to the creaminess of the hummus.


I love olives. When I was a kid my father would take me to the West Side Market in Cleveland and we would stop at the pickle and olive stand, for some oily purple-black kalamata olives which my parents enjoyed with red bell peppers and olive oil on pasta. I preferred to eat the olives plain, or alongside the little stuffed pickled eggplants also sold at the stand, making an oily mess of my little hands.


I used a mixture of pitted kalamata and green greek olives, but I think using one type would also work just fine. Kalamata alone would probably produce a pale purplish red hummus, which might be nice at a festive party. I spread some of my hummus onto toasted pita quarters and sprinkled them with chopped olives and za'atar for a nice finger food appetizer. 


Olive White Bean Hummus

1 Can Garbanzo beans
1 Can Great Northern White Beans
1/3 C Olive oil
1/3 C Tahini
1 C Pitted Olives (Kalamata or Green greek olives)
Juice of 1/2 lemon
3 Cloves Garlic
2 Tsp Za'atar (optional)

Open cans of beans, drain and rinse thoroughly under running water, add to food processor with lemon juice, garlic, olive oil, tahini, 3/4 chopped olives, and 1 tsp za'atar. 
Blitz until hummus reaches desired smoothness, between 2-5 minutes. Chop remaining olives fairly fine. Scoop hummus into a large bowl, smooth out the top, drizzle on additional olive oil, and top with chopped olives and sprinkle with remaining 1 tsp za'atar, if using.
Serve with warm pita, carrot or celery sticks, or other desired dipping food.


Wednesday, November 20, 2013

Medlar Gingerbread with Caramel Glaze


I baked this cake on Sunday, and when it was done I opened the oven, bent down to remove it, inhaled deeply, and was immediately thrust back in time to my childhood in Ohio, and biting into fresh gingerbread smothered in apple butter at Christmas in Frostville.


 Frostville is one of those living museums, a historic town preserved in valley park, and at Christmastime one can come down and tromp over the snow covered fields from preserved house to preserved cabin and learn about Christmas traditions throughout American history. One house is always baking gingerbread, and it has long been my favorite. 


It's a small house, the gingerbread bakes in a wood burning oven in the kitchen, but the smell permeates from the back porch straight through into the teeny tiny bedroom. It's warm and rich, dark, cinnamon-ginger-y, with a heavy taste of molasses. However, snacks are not served in the historic houses, so while you tour the house, your mouth watering, you dream of the barn, where the snacks are waiting. 


There is hot apple cider, frosted sugar cookies in the shapes of candy canes and gingerbread men, and of course, there is gingerbread and apple butter. Biting into that thick layer of sweet apple butter atop spicy, complex gingerbread was emblematic of the entire holiday season to me as a child.
The gingerbread I present to you today is my attempt to match that experience.


This gingerbread is luxurious. The fresh ginger and molasses are the strongest flavors, but the medlar (or apple, up to you), is not lost in the cake at all, I found my medlar flavor came in bits and bursts of creamy applesauce taste.


What is a Medlar? You may be wondering. A medlar is a delightful fruit. It's quite an old fruit, everyone from the ancient Romans to the medieval Brits have enjoyed the medlar. Shakespeare wrote about the medlar in several of his plays, but what he had to say about it was a bit, uhm, naughty. Apparently Shakespeare thought medlars looked a bit like a ladies... well, bits. As a lady, however, I'm not sure I see the likeness. And I've very recently looked at a lot of medlars.


Anyway, literary references and innuendos aside, I assure you the medlar is a wonderful fruit. I've had two opportunities to bring some home, both times from Maggie Nesciur of Flying Fox's fruit stand at New Amsterdam, the best darn market in town. 


Medlars are a small fruit, brown and hard when harvested, but you must blet them before eating them. Bletting is a process of over-ripening the fruit. It's very easy, simply arrange them, upsidedown, on a cookie sheet and set it somewhere fairly cool until they're all very soft on all sides, which took mine 1 week the first time I had medlars, but over 2 weeks this time. Then you can cook with them. Or just peel and devour them because they taste like cinnamon-creamy-applesauce-pie-heaven.


I know I said this was my month of Thanksgiving, and I know gingerbread probably seems a bit more Christmas than Thanksgiving, but I assure you this is a lovely dish for Autumn as well, especially with the caramel sauce drizzled over top. Also, Christmas is coming, guys. It's coming.


If tracking down medlars and waiting for them to blet doesn't sound like a great time to you, applesauce will make a fabulous substitution, which I why I'm providing my go-to slow cooker maple applesauce recipe which makes a vat of dark golden brown, maple swirled apple goodness, it's at the bottom of the page.


Medlar Gingerbread with Caramel Glaze 
This recipe will make 1 large bundt cake or two smaller cakes. I made 1 small bundt and 1 small rectangular cake.

1 C butter
2 Cup Flour
1 C Brown Sugar
1/3 C Molasses
About 24 bletted medlars (or 1 C applesauce)
4 tsp grated fresh ginger
3 tsp cinnamon
1/2 tsp all spice
3 eggs
1/2 C water
2 tsp baking soda
1/2 tsp salt

Caramel Glaze:

1 packed cup brown sugar
1/2 cup heavy cream
4 tablespoons butter
Pinch salt

Medlar Preparation: 

Medlar flesh is like a paste consistency, or super thick apple butter. I used about two pounds of Medlars. Make sure yours are thoroughly bletted (allowed to overripen). Medlars are best when very soft, the inside should the consistency of applesauce, and will also smell like lovely cinnamon applesauce. To blet the medlars place them top down on a cookie sheet and sit them near a cool window until very soft. This took my medlars about two-three weeks.

Once bletted, peel your medlars (this is pretty darn easy, the skin is soft and thin), and separate the flesh from the skin and seeds. This is tougher. Most of the medlar is seed, but the flesh grows around and between them. I found it easiest to completely peel the medlar, then run my thumb between each seed and extract the flesh. Put all the flesh into a measuring cup to keep track of how much you have. I also tried to remove as much flesh from the skins and seeds as possible.
I peeled and defleshed about 20 medlars for this recipe (all my ripe ones), and got about 3/4 cup of medlar fruit. Supplement with applesauce if needed to bring the measurement up to 1 Cup.

Medlar Gingerbread:

Preheat oven to 350 degrees fahrenheit. 

Grate your fresh ginger. You can do this with a ginger grater, or my personal favorite, a microplane (I bought mine about a year ago, and I'm in love with it, and the short work it makes of hard vegetables and cheeses).
Cream together the butter and sugar in a large bowl with a stand mixer, fork, or a hand mixer. Add the medlar flesh or applesauce, and  molasses, mix again. Add the eggs and spices, mix again until well combined. Add water, and beat until well incorporated. 

In a separate bowl combine flour, salt, and baking soda. Mix well with a fork until thoroughly blended. 

Slowly add the dry ingredients to the wet while mixing on low speed. Scrape the sides of the bowl and mix again until all ingredients are incorporated. Try not to over mix. 

Pour into a well greased bundt pan and bake 45-55 minutes, until a toothpick inserted into the center comes out clean.
Let mostly cool before pouring on glaze.

Caramel Glaze

 Add the cream, butter, and brown sugar to a saucepan and mix over low heat, whisking until the butter melts and the brown sugar breaks up into the milk, then turn heat to medium and cook 6-8 minutes, whisking continuously, until it's thickened up to a nice glaze consistency. Set aside to cool. 


Slowcooker Maple Apple Sauce

8-10 apples of varying types
1/3 C maple syrup
1/4 water

If you prefer your apples peeled, you may peel them. I don't peel mine, and find that once blitzed, the skins are undetectable in the sauce, however I never peel my apples in any recipe, so if you prefer a peeled apple in baked goods, feel free. 

Chop apples into 1x1 inch pieces and toss them in your crock pot along with the water and syrup. Set your slow cooker to low and cook for 6-7 hours. 

Remove any excess liquid (leave a bit though, just don't allow the apples to be swimming in it) then, if you prefer a chunky apple sauce, mash it up with a large spoon. If you prefer it smoother, pour the mixture into a blender/food processor and blitz until smooth. I did mine in my food processor for about 1 minute, and it came out mostly smooth. 
Eat it hot, or pop it in your fridge. It should last up to a week in there.


Monday, November 18, 2013

Pumpkin Apple Soup


I cooked up a lovely batch of this soup last weekend, but only thought to photograph it after trying it and discovering just how delicious it was. Despite my few photos, I had to share it with you. It's lovely, the pumpkin and apple are an easy coupling of autumn flavors, and with the caramelized onion in there, it is basically a trifecta of my favorite seasonal tastes. 
It's officially cold in New York, and between the chilling wind, the brown leaves on the ground (where did they come from? I don't see any trees.), and the short days, it's clear Winter is not far off. This time of year just makes me want to bake apples, roast winter gourds and sweet potatoes, slow cook huge pots of beef stew, and eat a lot of gravy. This soup addresses many of my autumn flavor needs, is thick and hearty, and has a lovely rich orange hue. It's a celebration of the late autumn harvest, and would make a great first course on Thanksgiving.


Pumpkin Apple Soup

16 oz Pumpkin Puree (homemade or canned)
2 Carrots
2 Granny Smith Apples
1 Yellow Onion
3 Cups Chicken Stock
1 Cup Hard Apple Cider
1/2 Cup Whole Milk or Half'n'half
1/2 tsp cinnamon
1/2 tsp allspice
Olive Oil for frying


Chop the carrots, onion, and apples. Add about 2 tsp olive oil to the bottom of a large soup pot and add the chopped onion. Cook over medium-low heat for 5 minutes, until onion has softened and turned transparent. 

Add the carrots and apples, mix, and cook another 5 minutes. Sprinkle allspice and cinnamon over apples/onions/carrots, mix well, cook another 1-2 minutes. 

Add the apple cider in splashes, while mixing the pot, to deglaze the pan. Mix thoroughly, then add the chicken stock. 

Bring to a boil, then reduce to a simmer and cook for 30-40 minutes, until carrots and apples are soft. Add the pumpkin puree and milk (or be bad like me and use half'n'half), mix well. Remove from heat and puree, either in batches using a blender or food processor, or with an immersion blender, until smooth. 

Return soup to pot, and heat over low for another 5 minutes, mixing occasionally, then serve.


Homemade Pumpkin Puree (optional)

1 Sugar Pumpkin
Apple Cider

Cut pumpkin in half, scoop out seeds, cut into quarters and bake, flesh up, on a cookie sheet in a 350 degree oven for 35-45 minutes, until flesh is soft when poked with a fork. 
Peel off the skins and puree the pumpkin in a food processor or blender until smooth. If you want to thin it out a bit add a splash of apple cider. 

Tuesday, November 12, 2013

Rustic Maple-Caramel Pie


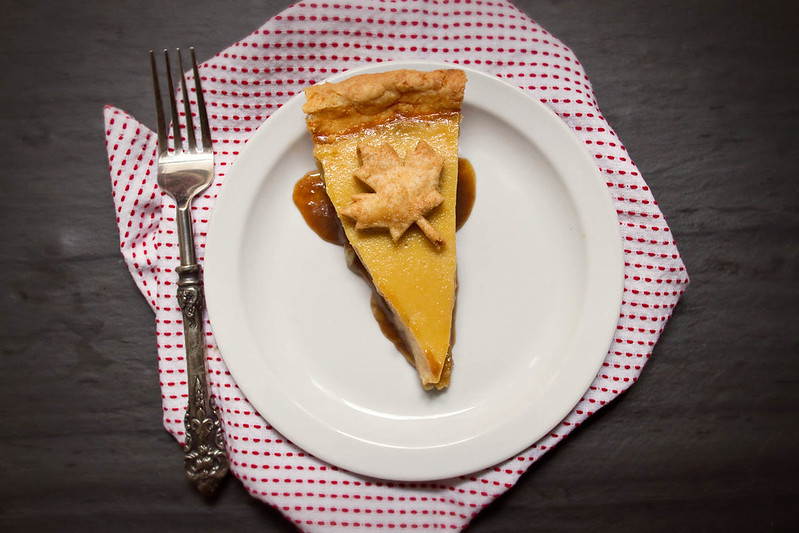
This week, for my second installment in my month of Thanksgiving cooking, I present to you this rustic maple-caramel custard pie. This may be the most Autumnal pie I have ever tasted. It is, quite frankly, a masterpiece. 


The maple custard is based off 
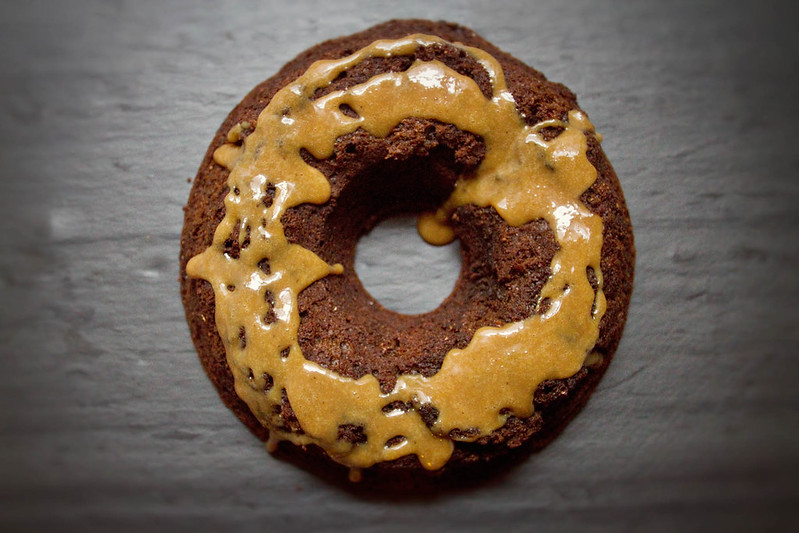
Nancy Baggett's recipe, but I dressed it up with a caramel layer and a few dashes of spice. The caramel bubbles up the sides of the crust and then sets firmer in the fridge. The crust is buttery and flaky, and the custard- oh, the custard. If you like traditional custard pies you will love this maple laced version. 


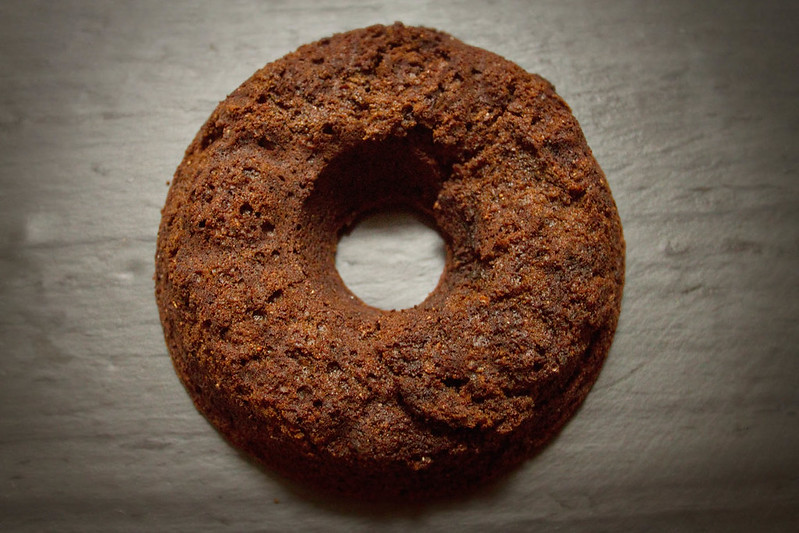
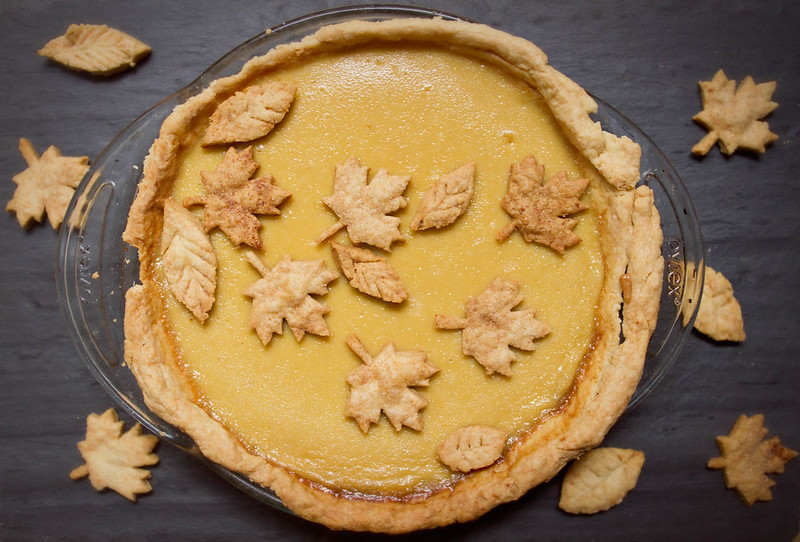
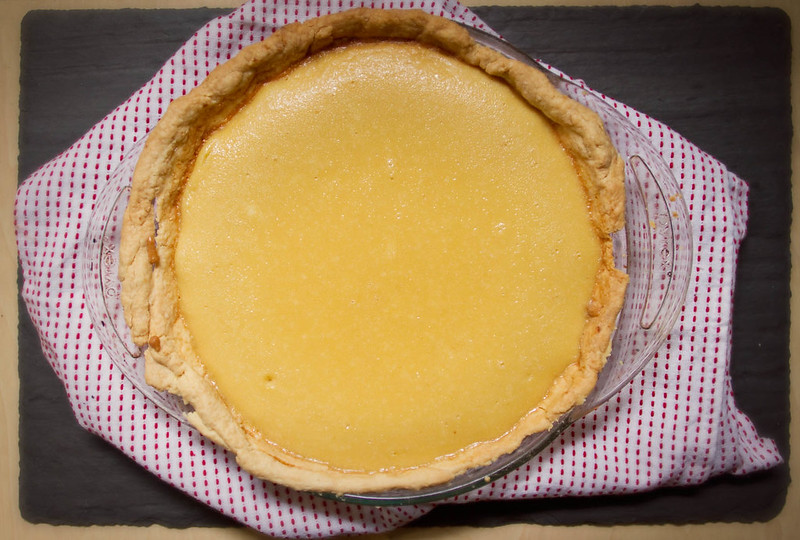
The custard is thick and silky, with a light brown dulce-de-leche color. Prior to decorating, the bare pie resembled a giant harvest moon against the inky darkness of my slate board. The taste is creamy, lightly spiced custard doused in deep, complex, dark amber maple. The syrup is definitely the main flavor, but it doesn't overwhelm the creamy custard. 


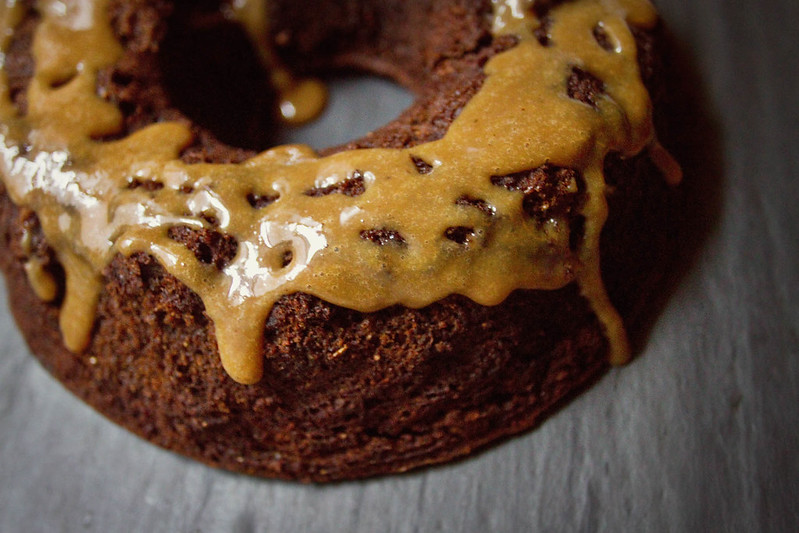
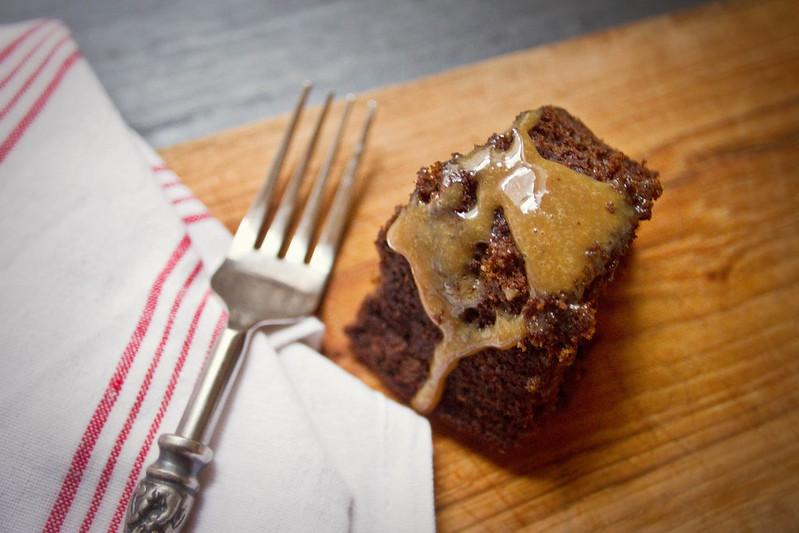
The caramel intensifies the maple flavor, and plays off it, adding a that nutty-lightly-burnt-caramel taste to the already complex pie. It nestles against the flaky crust and oozes out the sides of a cut piece in a lovely fashion.


As we were trying our first slices, I was remarking upon how much I love traditional custard pie, and S said he wasn't sure he'd ever had it. 
"Does it taste like flan?" He asked, "Because this kind of taste's like flan, but with maple." 


I was surprised, as I thought plain custard pie was a very common type of pie, but S seemed completely unfamiliar with it. I would make him one, but now I don't know if I could ever resist the urge to add maple again. The deep, sweet complexity of the maple was a fantastic alternative to sugar. 


I have always been a fan of true maple syrup. When I was young in Ohio my mother would take me to an annual sugaring in a nearby park, and we would watch the big, bathtub-sized vats of syrup boiling away, and the men stirring them with long wood sticks would let me take a turn at stirring the syrup, there would be syrup to sample, and hot syrup poured onto snow to make delicious maple candy. 


My family also skiied at a resort that tapped their trees in western New York, and when I was young they had a sugar shack on premises, and on sugaring days there was always a sweet smell in the air on the chairlift near the Sugar Shack.  I used to sit on the lift, swinging my tiny skiis back and forth, imagining hiking off the trail and up to one of those tapped maple trees and dipping my finger into the bucket hanging from it to sample the fresh sap.


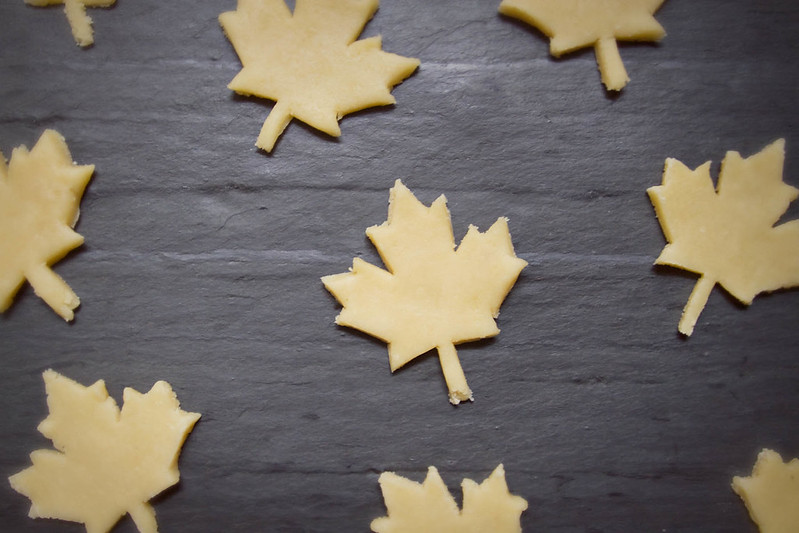
For this pie, I decided to try my hand at decorative leaves. I figured that such a thing as maple leaf cookie cutters probably existed, but I certainly did not have the patience to order them, then put this pie off until they arrived in a week. So I found a clipart maple leaf, printed it out, then used a knife to cut around it on the dough. 


Truthfully, I was more than a little surprised at how well it worked. I am not a skilled drawer, and unless it's holding a camera, I do not have particularly steady hands, but it turns out dough is pretty darn forgiving. I even freehanded my little teardrop shaped leaves. 


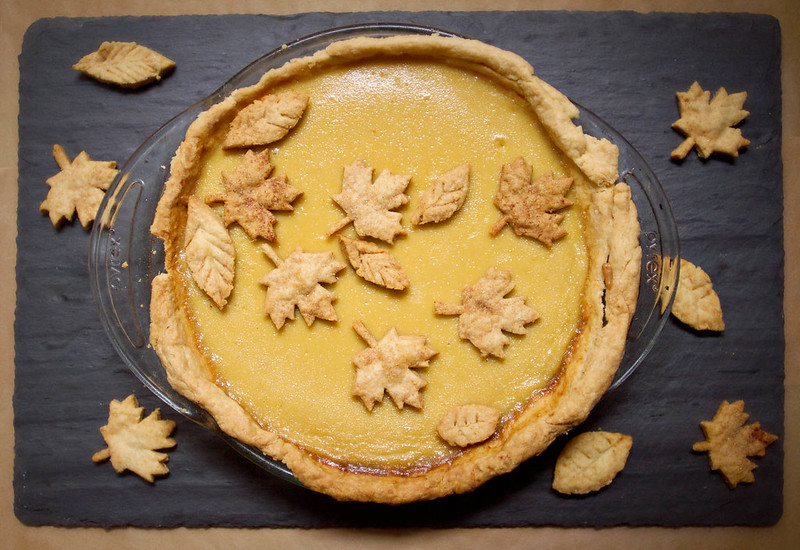
As adorable as this pie turned out, it tasted even better. It would make a fantastic addition to a Thanksgiving dessert spread, from its autumnal coloring and decorations, to the deep, complex maple-caramel flavor, this is a vey seasonal pie.


Pie Crust

2 1/2 C Flour
1 tsp salt
1 tsp sugar
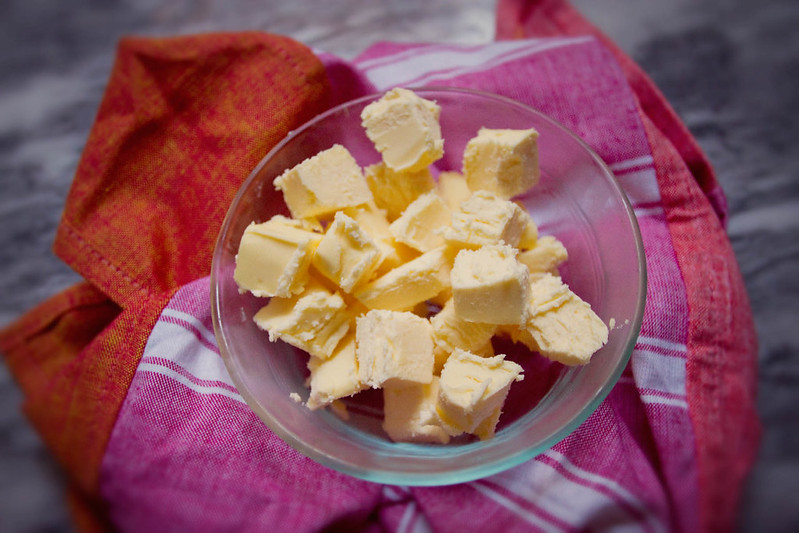
16 tbsp (1 Cup) Cold Butter, cut into cubes
1/4-1/2 C ice water


Maple Custard Layer

3/4 C Half'n'nhalf
1 tsp cinnamon
1/4 tsp all spice
1 Tbsp Cornstarch
1 C heavy Cream
3/4 C Maple Syrup, dark amber
4 Large eggs
Pinch of salt
2 tsp vanilla or almond extract


Caramel Layer

1 1/4 C packed brown sugar
1/3 C half'n'half
3 Tbsp Butter
pinch of salt
1 tsp vanilla or almond extract


Crust:

If making maple leaf decorations for the top of pie, make the whole recipe. If you don't want decorations and some extra dough to make pie crust cookies, then 1/2 the recipe for the crust.
Combine dry ingredients in food processor, pulse a few times to mix. Add butter and pulse until mixture resembles bread crumbs. Add 1/4 C ice water and pulse to incorporate. Squeeze some dough together, if it clumps well then it's ready, if too dry add another 1/4 C cold water and pulse again. 
Dump food processor contents onto a large piece of parchment paper or plastic wrap, divide in half, and form dough into two disks. Wrap in plastic wrap or parchment paper and refrigerate at least 1 hour. 

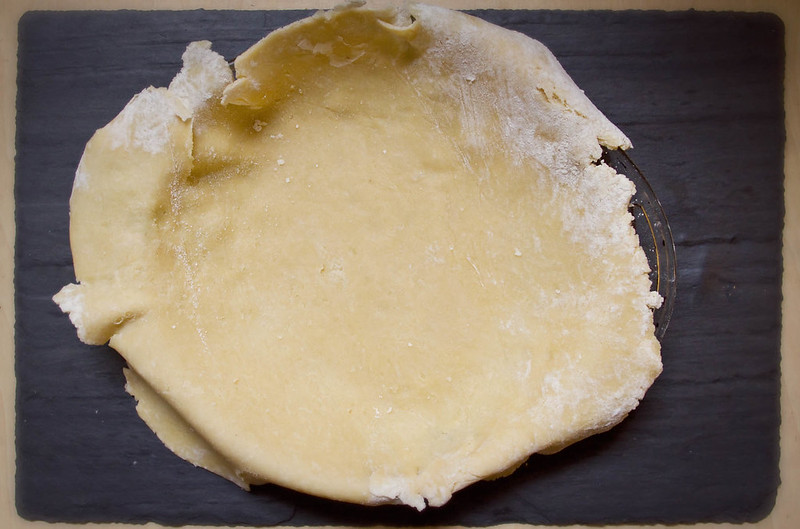
After dough is chilled, preheat oven to 400 degrees, roll out dough and place in a greased pie pan, forming to the shape of the pan, then trimming edges.  Line dough filled pan in aluminum foil or parchment paper and fill the pie pan with dry beans or rice to weigh down the crust while par-baking. 
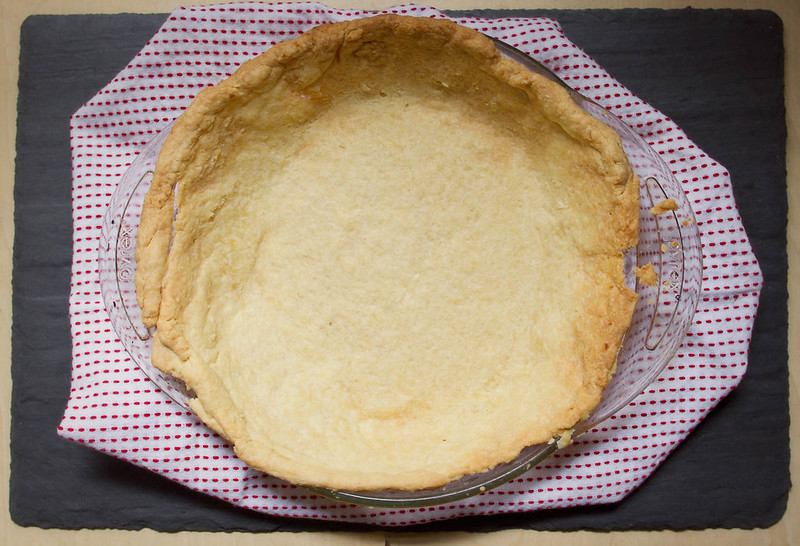
Bake crust for 25 minutes, remove from oven, carefully remove foil and dry beans, place back in oven and bake 5-8 minutes longer.


Caramel Layer:

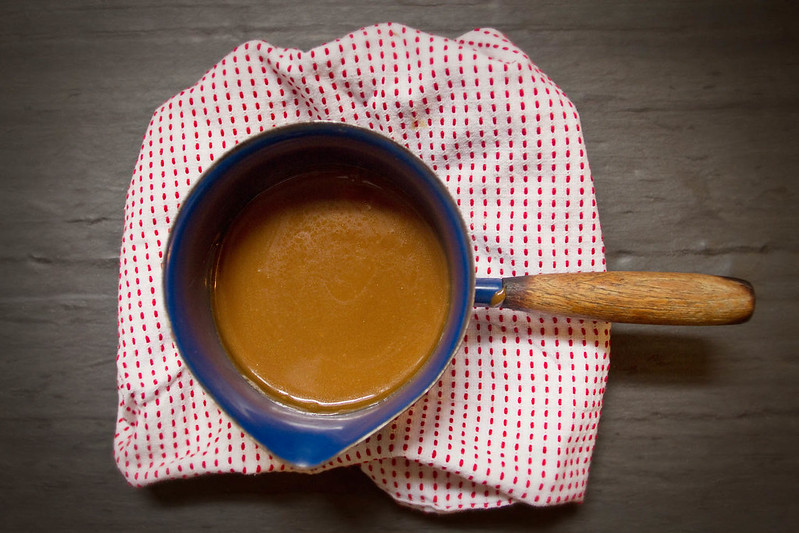
Make caramel layer while the dough chills. Mix brown sugar, butter, half'n'nhalf, and salt together in small saucepan over medum-low heat. Cook until well combined and then reduce heat to low and cook until thickened 6-8 Minutes. Add vanilla or almond extract and cook another 2-3 minutes. Remove from heat and set aside.


Custard: 

After crust is baked, set oven to 325 degrees. In a non-reactive saucepan whisk the half'n'half and cornstarch together until no lumps remain, then whisk in the heavy cream, cinnamon, and allspice.
Place over medium heat and bring to a gradual boil, whisking all the while, until it thickens slightly. About 2-4 minutes. 

Warm caramel at this time in a bowl or saucepan in a warm water bath if it has thickened and cannot pour.

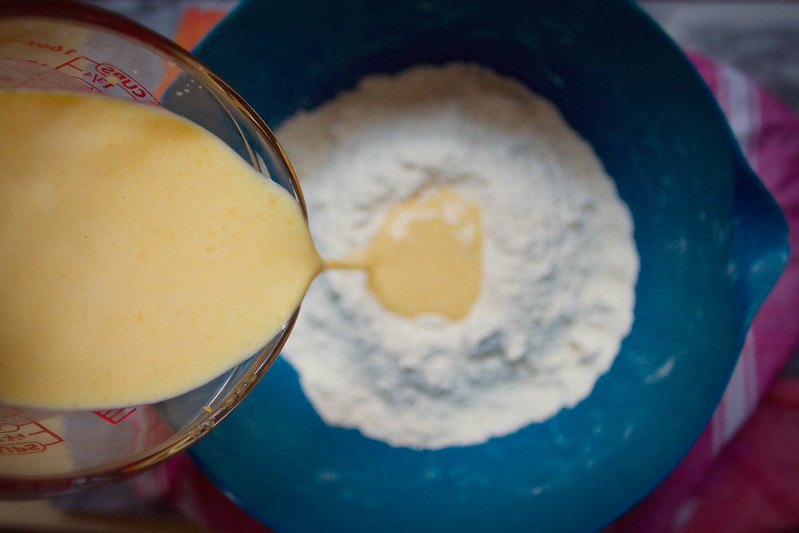
Remove from heat and cool five minutes. While cooling, in a separate, heat safe bowl, whisk together the eggs, maple syrup, salt, and vanilla until well incorporated. Very, very slowly, whisking all the while, pour the thickened cream into the egg/maple mixture. Do this in a slow stream to avoid cooking the eggs with the hot milk. Whisk well once all combined. 


Assemble Pie: 

Pour caramel into the bottom of the pie pan, then pour custard through a fine sieve into the pie crust. 
Bake at 325 Degrees for 15 minutes, then reduce temperature to 300 degrees fahrenheit and bake for another 30-35 minutes, until all but the center of the pie is set. The center can remain a bit jiggly when you take it out of the oven. 
Cool on a wire rack until room temperature, then refrigerate 2-3 hours, until chilled. 


Decorations (optional):

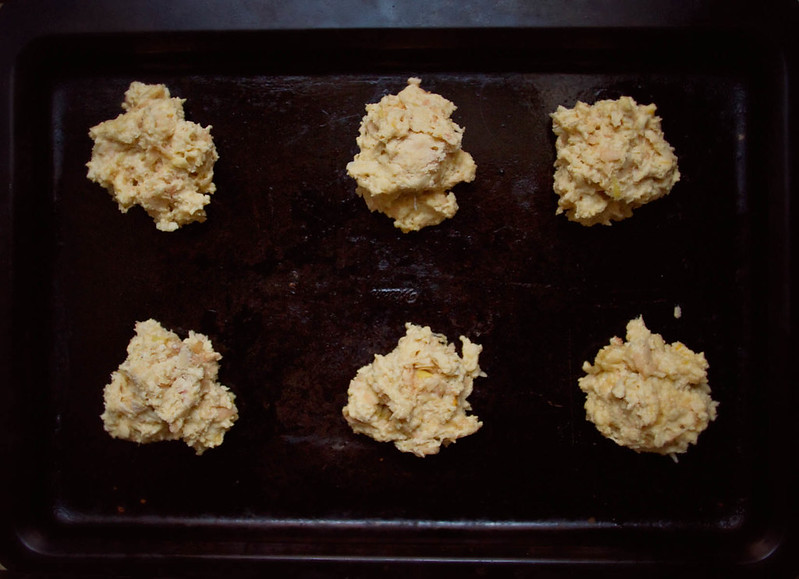
While the pie bakes, if you want, roll out remaining pie dough, and using a cookie cutter, like this one, or by using a knife to trace the template provided (follow link, right click, select original size, then print), cut maple leaf shapes into the rolled out dough. feel free to freehand some other types of leaves too, if you want. 

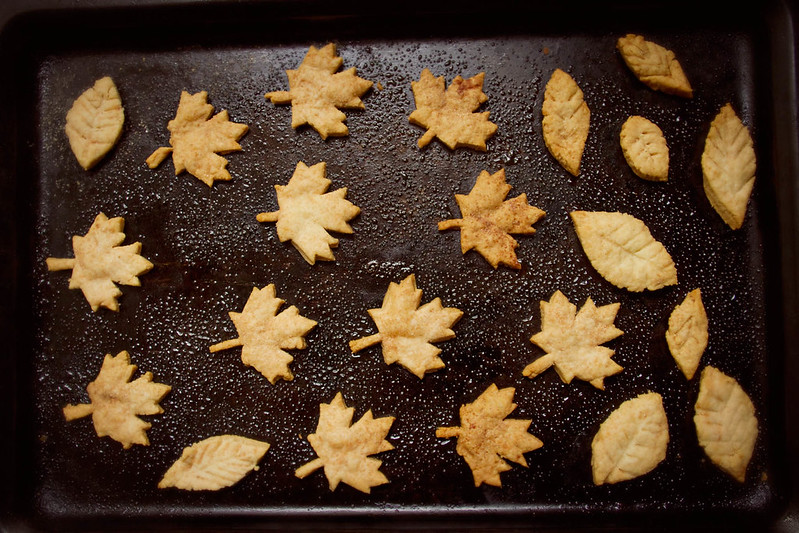
After pie is out of oven, heat to 350 degrees fahrenheit and place maple leaves on a greased cookie sheet and bake 10-15 minutes.

Once pie has chilled at least one hour, arrange leaves on top of pie in whatever manner you like. They'll stick to the custard as it sets.

I like to remove the pie from the fridge about 20 minutes before serving.


Tuesday, November 5, 2013

Pumpkin Apple Cheddar Biscuits


It has been five years since I was with my family for Thanksgiving. It's hard, logistically and monetarily, to make it home twice in two months, so I've always prioritized Christmas (the king of all holidays), and consequently I've had some interesting Thanksgivings.


There was the year in Olympia my best friend and I roasted a Turducken with our classmates, only we put a cornish game hen inside the chicken, inside the duck, inside the turkey. So we called it Feastsgiving, the Four Fowled Feast, and it was amazing. There was the year I went to Montreal with S and his family to see his brother, and used my broken high school French to buy the pies for dessert at a tiny little bakery. We created a full Thanksgiving feast and ate it with his brothers Canadian roommates. There was also one year where I sat alone in a dorm room with my broken leg in a cast while my then-boyfriend hung out on his friend's family's private island in the Puget Sound. That was the first, and indisputably worst, year. 


This year, again I will not be going to Cleveland, but my mother will be coming here! It will just be S, my mother, and me for Thanksgiving, so we're going to roast the smallest turkey we can find, and I suspect I will have quell my desire to make atleast ten side dishes, lest we end up with a fridge so full of leftovers we cannot close it. Consequently, I have declared the month of November Thanksgiving Month. 


All month I shall be making, and posting, Thanksgiving themed sides, appetizers, desserts, and baked goods. I shall make a complete, delicious, vast Thanksgiving feast, one dish at a time, and share it all with you. Beginning, deliciously, with these biscuits.


These biscuits, made with grated cheddar, pumpkin puree, and Kerrygold Dubliner cheese, are heavenly. The consistency is on par with a regular drop biscuit, though a bit moister due to the apple. S thought the extra moistness was their crowning glory, but I thought it was the subtle hint of nutmeg mixing with the cheese. 


The pumpkin, of course, tastes of earthy, semisweet autumn flavors, augmented by the sweet and tart apple, while the cheese melts luxuriously in little pockets, creamy and delightful. These are great with dinner, and would be a phenomenal substitute for the usual Pillsbury dinner rolls in a Thanksgiving spread!


Pumpkin Apple Cheddar Biscuits
You can use canned or homemade pumpkin puree in this recipe. I have provided the recipe for my homemade pumpkin puree below, which is what I used.  

2  cups flour
2 tbsp honey
2 1/2 tsp baking powder
1/2 tsp baking soda
1/2 C - butter chilled and chopped into small cubes
1 small apple - grated
3/4 C Dubliner cheese or sharp cheddar
1/2 C buttermilk
3/4 C Pumpkin Puree (canned or homemade)
1/4 tsp ginger
1/4 tsp nutmeg
small dash salt

preheat oven to 375 degrees fahrenheit. 
In a large bowl combine flour, baking powder, baking soda, salt, nutmeg, and ginger. Mix well with fork to combine.

Cut in butter with two forks, your hands,  or pastry cutter until mixture resembles coarse crumbs.
In large measuring cup, combine buttermilk, honey, and pumpkin puree. Mix until well combined.  
Stir in pumpkin puree mixture until flour is just moistened. Gently stir in grated apple and cheese. 

Use a large table spoon to scoop out the biscuits and drop them onto a greased pan. 

Bake for 13-17 minutes. 
These are delicious served warm with butter, jam, or I imagine they would be amazing with apple or pumpkin butter!


Homemade Pumpkin Puree: 

Cut one small pumpkin into halves, scoop out the seeds and stringy bits. Cut the halves in half, and bake in a 250 degree fahrenheit oven for 45 minutes, or until pumpkin flesh is soft when poked with fork. Remove from oven, allow to cool, and scoop the flesh out of the skin. Place in a food processor, and if you're like me and prefer it a bit thinner, add about 1/4C of apple cider. Process until smooth.