Tuesday, August 27, 2013

Avocado Summer Rolls with Spicy Peanut Sauce


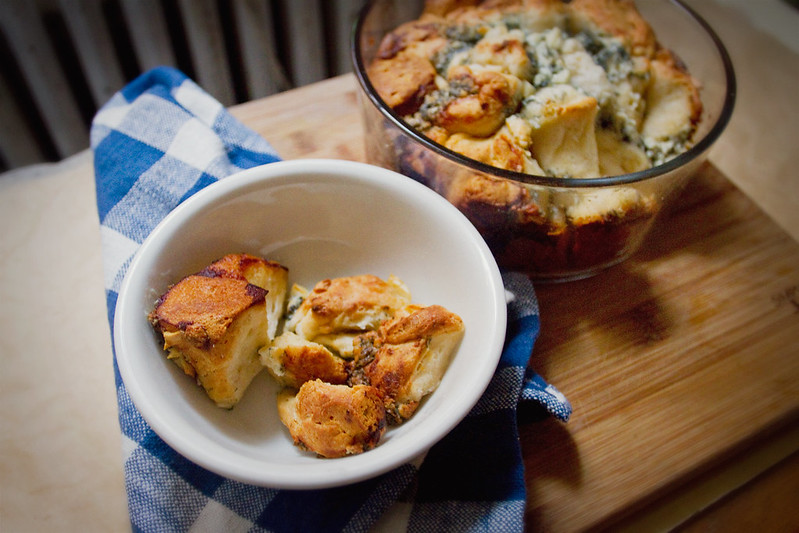
While in Cape Hatteras earlier this summer, S and I made Summer Rolls with my father. This is one of his specialties, and he makes them pretty traditionally, with lettuce and basil, noodles, cucumber, carrots, and shrimp. They were delicious, super simple, and reminiscent of dinners at a Cambodian restaurant in Cleveland I've been going out to eat at with my parents for as long as I can remember.


My father makes a lot more asian food than I do. From Laab to Bahn Mi to hand rolled sushi, when asked, he proclaims things like "It's easy, you pickle the radishes in your fridge the day before, and the sauce is just caramelized shallots with fish sauce, rice vinegar, hoisin, and chopped thai chilies." Suddenly I understand how my noncooking friends feel when I suggest that it's really very simple to make grasshopper pie with fresh mint and heavy cream dyed green with spinach juice.


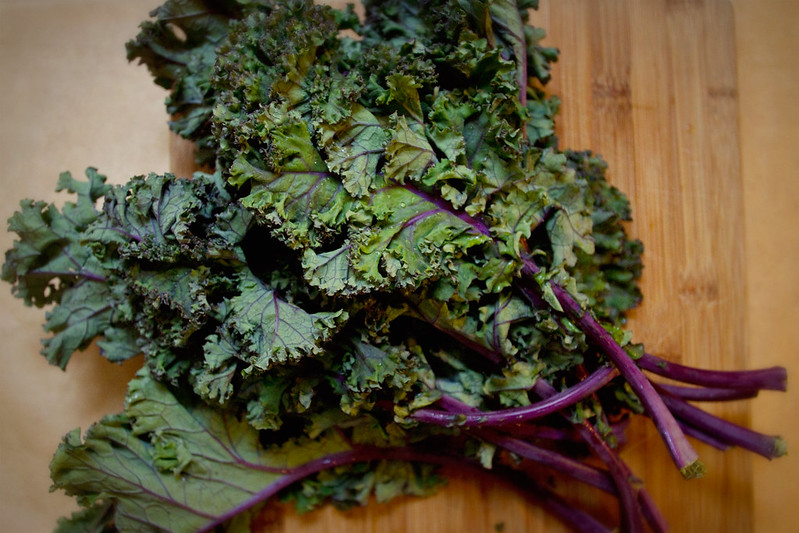
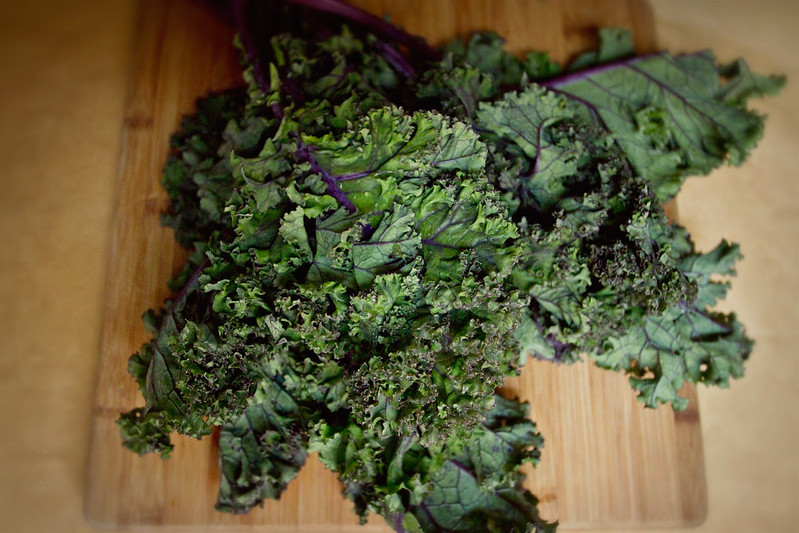
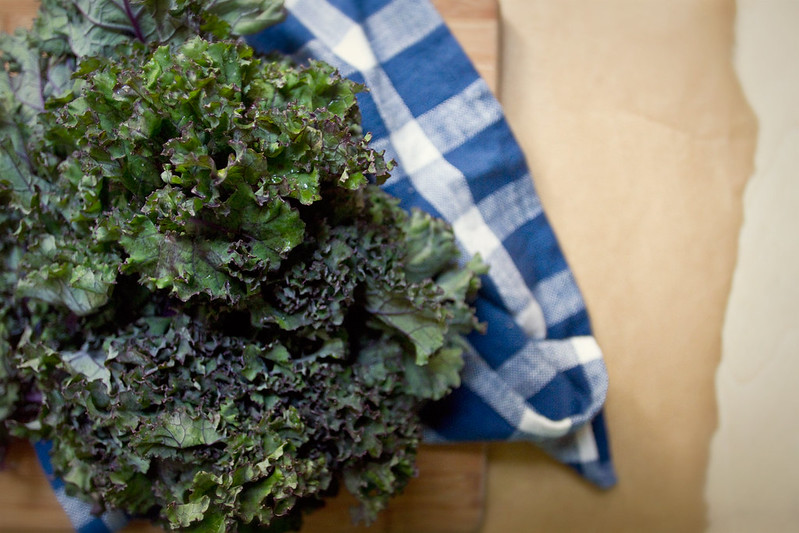
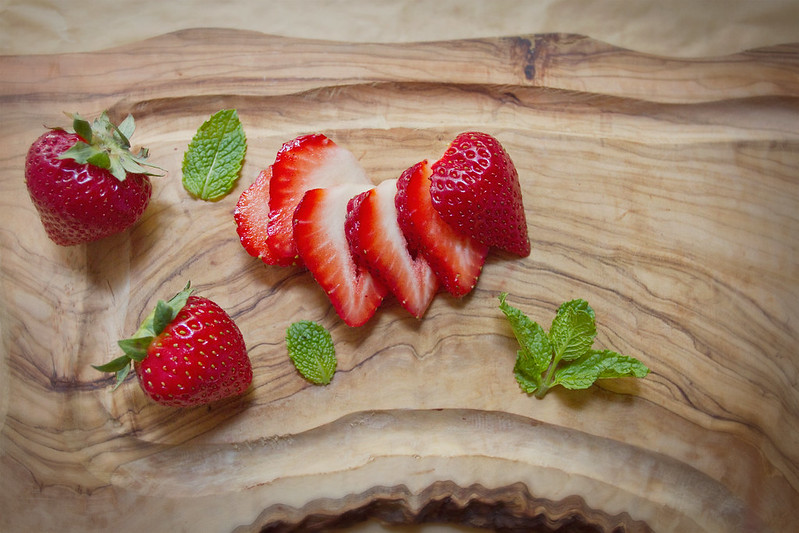
Despite the fact that I undoubtedly got my love of cooking and food adventurousness in part from my father, we have pretty different preferences about what we cook.  My father does not cook asian fusion, nor does he have a taste for kale, or strawberries on a pizza. He will probably take issue with the dandelion I suggest you add to this summer roll.  It's not authentic, and what's more, it's hippie food. Dandelion, it's a weed!


I, however, clearly have no such qualms. I have no problem with taking a traditional dish I enjoy and removing any elements I don't particularly like and adding in ones I prefer. I won't claim this roll is Vietnamese or Cambodian in any way, it is definitely heavily Americanized, it's been vegan-ified, rendered mostly raw, and generally made pretty healthy, but it is also so, so, so delicious. S and I made more the day after I made this batch. 


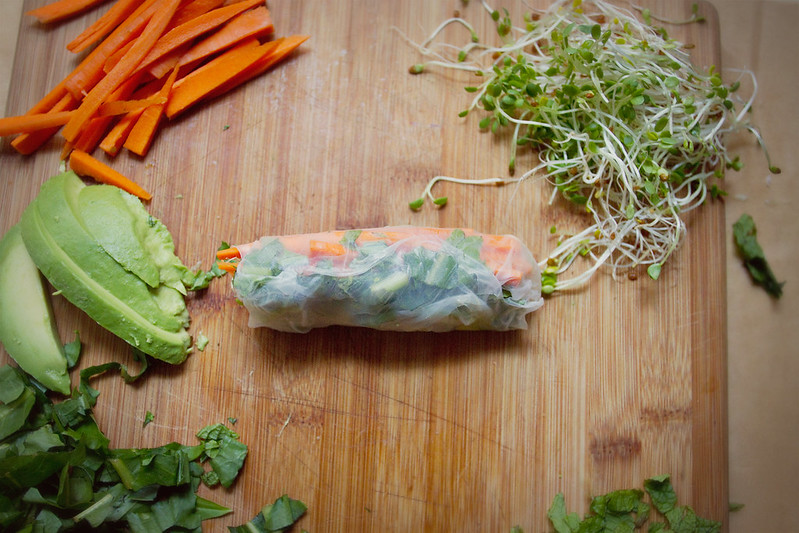
The sprouts are reminiscent of the noodles in more authentic rolls, and the slightly spicy dandelion mixes nicely with the cool bits of mint and the velvety avocado, while the carrots provide a lovely crunch. It's all around good.


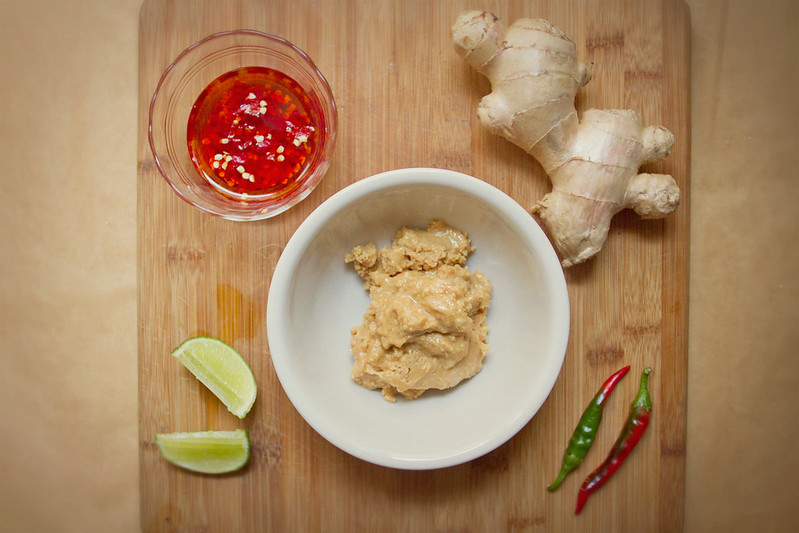
You can use store bought or homemade peanut butter for the sauce, chunky or creamy. I used homemade chunky peanut butter, and it was great. I prefer it spicy so I used two big tablespoons of the chili oil (make sure to scoop in some chili bits too), but you can definitely use just a bit of chili oil if you're sensitive to heat.


These rolls would be great as appetizers as a summer dinner party, you could even enlist the first few guests to help with the rolling process. The fillings could definitely be changed around to offer a few options at a party as well, you could add cucumber to some, or matchsticks of marinated beet, or swap out the avocado for marinated slices of tofu, and a small handful of edamame in some could definitely be interesting as well. Feel free to mix these up any way you'd like, I would love to hear about any variations!


Avocado and Sprout Summer Rolls

6-8 Spring Roll Skins
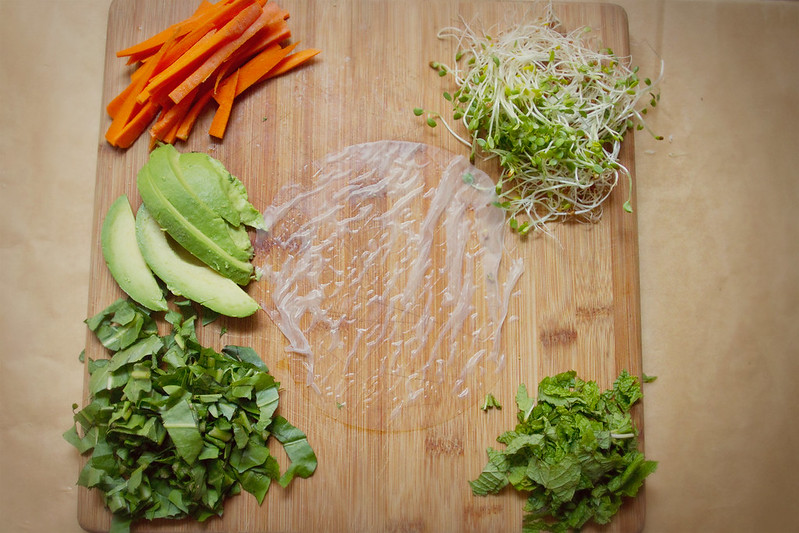
1 Avocado
2-3 Carrots
1 1/2 C Chopped Dandelion or Arugula Greens
3/4 C chopped mint
1 Cup Sprouts (I used clover and arugula, but use what you like)
Shallow dish of lukewarm water, such as a pie pan or lipped plate

Spicy Peanut Sauce

1/2 C Peanut Butter
2 Tbsp Sesame Oil
1 Tbsp Chili Oil
2 Chopped Chilis (I used 1 Cayenne, 1 Cherry bomb, but any kind will do)
1 Tbsp Grated Ginger
1 Scant Tbsp Soy Sauce

1 Tsp honey
1/4 Lime

 Spicy Peanut Sauce:
Combine the sesame and chili oils in small bowl and add the chopped chilies. Let this sit a while, you can even let it sit overnight- though this will make it quite spicy. In a separate small bowl, combine the soy sauce, honey, and ginger, mix well and let sit for 20 minutes or so as well. You can do this before cooking, or you can make the rolls while the peppers and ginger infuse their various liquids. Either way, after 20 minutes or so, add the peanut butter to your soy/honey/ginger mixture, along with 1-2 Tbsp of the chili/oil mixture, and squeeze the juice from the 1/4 lime into the sauce. Mix well. 

Summer Rolls:
Cut carrots into thin matchsticks. I do this by cutting the carrot into the lengths I want, about 3 inches, then cutting the pieces in to thirds lengthwise, then I slice those thirds into matchsticks. Set the carrots aside for now.
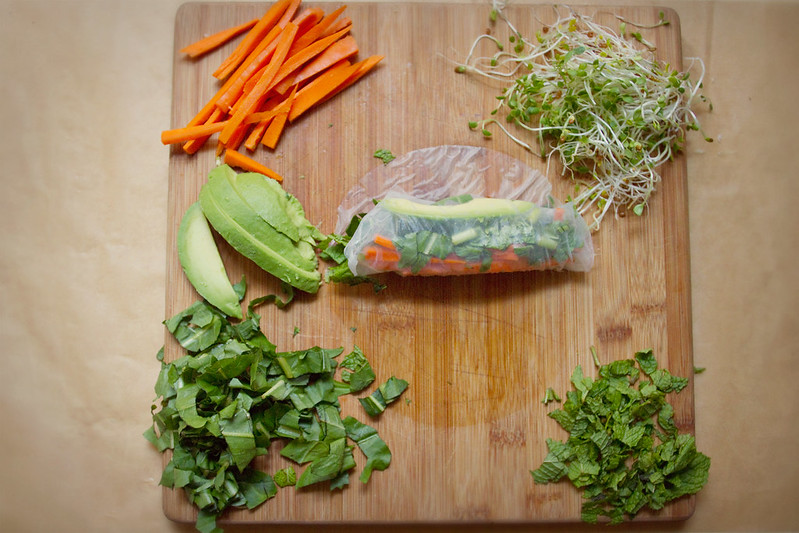
Slice the avocado, I cut mine in half, separate the halves, squeeze the side with the pit lightly so it loosens up, then remove it. Remove the skin from the halves, then slice. I cut each of my halves into four slices.

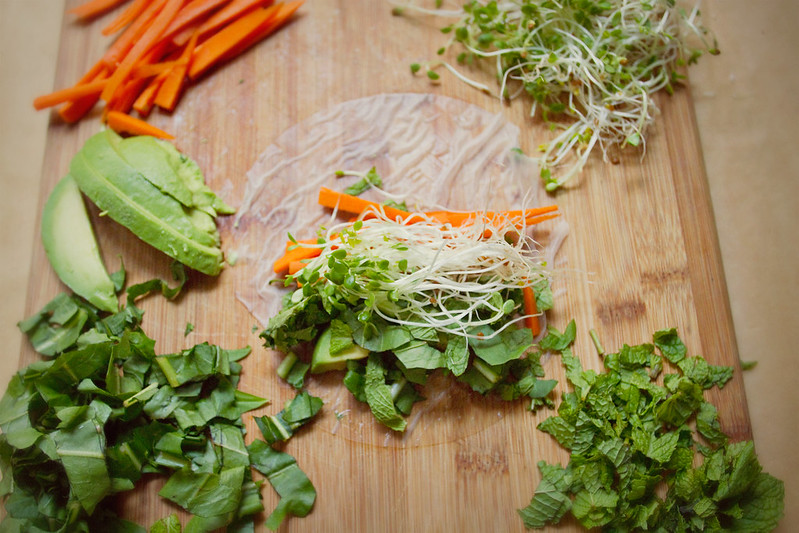
Situate all your fillings so they're easily accessible around an open area of counter for rolling up the spring rolls and the dish of water for wetting the wraps. Place one of the spring roll wraps into the dish of water for about 2-4 seconds, or until it begins to feel flexible, but not unmanageably soft. It will soften more once removed, so don't wait until it feels like a finished spring roll skin, it just needs a quick dip.
Remove the skin from water and set on your counter- you won't need anything to keep it from sticking, but you do need to work fairly quickly at the next part. 

Place a small pile of dandelion greens in the 1/3 of the spring roll closest to you, then a bit of mint, followed by a small pile of sprouts, then arrange a small pile of carrots on top. Add an avocado slice last, then roll spring roll. The rolling process is much like a burrito, or a taco bell mexi-melt. Take the edge of the spring roll wrapper beneath the materials and lift it away from the counter, gather your ingredients together close to the edge then roll it over about one rotation so all your ingredients are inside the wrapper. Take your loose ends and fold them in, like a burrito, then roll it over once more to close.

Do not stress if your first ones are funny looking- it takes a try or two to get a feel for the thin wrappers and how many ingredients to put in. You will totally get it, and the spring roll skins are sticky enough that they will stay closed, even if you roll them badly. 

Place finished rolls on a serving plate, don't let them touch too much, they can end up sticking to each other a bit. Serve soon after preparing, to avoid browning of the avocado. 


Thursday, August 22, 2013

Kale, Spinach, and Apple Salad with Mint-Chive dressing.


Kale is one of those vegetables people have strong polarized opinions about. It's undeniably healthy, loaded with vitamins A, C, and K, antioxidants, and even a bit of Calcium, but the flavor is not for everyone. Or is it? I used to think I hated Kale, but not anymore. 


Turns out, kale is one of those foods that tastes great with other flavors. It's fantastic with bacon, balsamic vinegar, and maple. In soup it absorbs all the lovely broth flavors. In juice it can hide with ease behind some beet and apple. Baked covered in pepper and paprika kale becomes a lovely chip. And when thinly sliced, paired with flavorful vegetables, and dressed well, raw kale makes a lovely salad.


I've been transformed from a non-kale eater, to an eater of only wilted kale covered in balsamic vinegar, to an eater of any cooked kale, to a juicer of kale, and finally, into someone who will eat kale raw, in a salad. Which is remarkable because aside from not eating raw kale, a few years ago I didn't really even eat salad.


That's right, growing up, I thought salad was not for me. The problem was the lettuce. It was boring. Then I discovered arugula, sharp and spicy and lovely, I slathered it in an unseemly amount of balsamic vinegar and discovered it was pretty good. Basically, what I'm saying is covering a vegetable in balsamic vinegar is generally what makes me like it. And yet, this salad contains no vinegar of any sort, and I love it. I've come a long way. 


The dressing on this salad really takes the cake for me. Or maybe it's the apple bits. Or the cool sliced mint leaves mingling with the deep, earthy kale. Basically, every element of this salad is heavenly. The chives add a nice sharp element, and the almonds add a bit of crunch. 


Salad:

3 C baby spinach
2  C thinly sliced Kale
1/2 C mint
1 apple
1/2 C slivered, sliced, or chopped almonds
1/4  of a lemon

Dressing: 

2 tbsp creme fraiche
2 tbsp olive oil
1/4 cup rough chopped chives
2 tbsp rough chopped mint leaves
Juice of 1 lemon
1/2 tsp fresh pepper


Toast the almonds-  add almonds to a dry frying pan and place over medium heat, stirring often to cook almonds evenly. They take a while to start toasting but once they begin to turn golden they'll all toast pretty quickly, so keep an eye on your pan and keep moving the almonds around. Remove from heat when toasted and set aside. 

Combine all dressing ingredients in food processor or blender and blend until mint and chive are well chopped and all ingredients are well incorporated. This took about 2 minutes in my food processor. 

Slice the mint thin and combine with the kale and spinach in a large bowl. 
Cut the apple into small pieces, I cut mine into matchsticks an then halved the matchsticks, but you could also do 1/4" cubes. Squeeze the 1/4 lemon over the apple pieces so they will not brown. 

Add the apple to the bowl with the spinach, mint, and kale, and toss to combine. Top with dressing, then almonds. 

Optional additional toppings could include gorgonzola (I liked this, but S did not), goat cheese, dried cranberries, sliced strawberries, or thinly sliced cucumber. 

Substitutions: Greek yogurt or sour creme could probably replace the creme fraiche in this recipe.


Tuesday, August 20, 2013

Hibiscus Tea Lemonade Popsicles with Raspberries

These are the popsicles I imagined when I bought popsicle molds. Popsicles so simple and inexpensive to make, yet bursting with flavors both sweet and tart. Popsicles that come together easily, from ingredients I usually have on hand, yet taste like some kind of frozen confectionary masterpiece. 


Herbal tea is one of my favorite drinks of all time, and hibiscus is one of my favorite types of herbal tea. I like hibiscus as hot tea, or iced tea, in sorrel, with seltzer from my soda stream, and now, as an Arnold Palmer style popsicle with lemonade. 


When I first decided I would make these I wasn't 100% sure about how to go about it.  Could I get the two liquids to stack, like some restaurants do? Should I make the tea and lemonade totally separately, like when one makes an Arnold Palmer drink? If I did that, I would either need to make a simple syrup for the lemonade aspect. While simple syrup isn't hard, I wanted this recipe to be very simple.


Then I realized I could just add all the sugar for the lemonade and the tea to the tea while it was hot, then add some cold water and lemon, and voila, Arnold Palmer. I then decided to add some raspberries because yum, raspberries. If you have a different berry- strawberry, blueberry, blackberry, any of these would work nicely in this pop. The berries aren't even necessary- the tea/lemonade pop would be great on its own.


Hibiscus Tea Lemonade Popsicles

4 Cups water, divided
3 hibiscus teabags (or 3 tsp loose tea)
Juice of 4 lemons
1/4 C Honey
3 Tbsp Sugar
1 Cup raspberries


Boil 2 Cups water, and add a few cubes of ice to the other 2 Cups water, to keep it nice and cold. 

When the water boils add the tea bags, let steep until the tea is a very rich red- about 4 minutes. 

Remove tea bags and add honey and sugar, mix until both dissolve fully. Add lemon juice and the ice water, mix well. 

Allow to cool for a bit if you use plastic molds, to prevent any melting or leeching of plastic chemicals. 

Add a small handful of raspberries to each mold, about 7 berries, and fill with the tea/lemonade. The berries will float at the top. If you wish to disperse them better you can push some down with your popsicle sticks when you insert them. 

Add your sticks/covers to your molds, and freeze about 7-8 hours. I run my molds under warm water for about 10-15 seconds before removing the pop when serving.

Substitutions: Black tea, the traditional Arnold Palmer tea, would be lovely in these pops, as would green, chamomile, or a myriad of fruity herbal teas. 
The 3 Tbsp sugar could be replaced with 3 tbsp honey, or 2 tbsp of agave syrup.


Thursday, August 15, 2013

Corn Chowder with Kale and Spicy Sausage


I was planning on waiting until fall to start posting soup recipes. You see, I love soup in the fall and winter, probably because of my affinity for buying local produce and the selection of said  local(ish) produce in Manhattan in winter is pretty much limited to kale, potatoes, squash, garlic, other root vegetables, and more kale, all of which are awesome in soup. From October-April one can almost always find some sort of bisque, or chowder, or other broth based delight on our stove. And so I wanted to wait until soup season to begin writing about soups. 


But then I woke up on Tuesday and it was raining, and not particularly warm, and I looked out the window at the grey sky and the wet, dripping Manhattan Bridge in the rain and I thought soup. Soup. It was definitely the right kind of day to cook up a big pot of soup. 


Luckily, it's corn season. I grew up in Ohio, where the corn is the best. I don't care what you say about Iowa or New Jersey, the corn in Ohio is the best. It's the sweetest, the cobs are the loveliest, it's just the best. The next town over from my suburb of Cleveland had an annual corn festival, complete with corn eating competitions, corn hole competitions, corn ice cream, a citizenship award called the Golden Kernel, carnival rides, and pretty much every take on corn based carnival foods you can imagine. Basically, what I'm telling you is we Ohioans love our corn.


However, all ripe, seasonal sweet corn is good corn, and so I snapped up (way too) many ears of lovely, Long Island grown corn, and decided I would make a corn chowder, one of my favorite soups. Corn Chowder is incredibly versatile, you can make it thick or thin, spicy or not, add chicken, add sausage, add dumplings, or not. Add potatoes, or not. Add white beans, or kale, or don't.   


For this soup, I originally planned on adding Chorizo, but when I got to Whole Foods the butcher was out of chorizo, so I figured I would get Merguez. They were also out of Merguez, so I went with their house made Spicy Lamb Sausage, and it was great, like a lamb Chorizo. So I am sure Merguez, Chorizo, or just about any other spicy sausage would be lovely in this soup. I bet rabbit sausage would also be great. 


And then I decided I wanted to put kale in the soup because I want to put kale in most soups. It's just so great in soup. If you think you don't like kale (I thought I didn't for many years), try it in a flavorful soup like this one, and you will wonder why you ever hated it. It loses practically all of its earthiness in soup and becomes soft and filled with broth-y flavor. 


This soup turned out great, the corn kernels burst in a lovely summery way when they're bitten, the kale adds a lovely green element, but the cream and dark sausage meat ground it as a hearty, filling dish. The spiciness will depend largely on the spiciness of your sausage, so feel free to add an extra pepper or some red pepper flakes if your sausage is fairly mild. 


Corn Chowder with Kale and Spicy Sausage

2 hatch peppers or poblano peppers
3 ears corn
3/4 lb Merguez, Chorizo, or other spicy sausage
32 oz chicken broth
3/4 C whipping cream 
3 Cloves garlic, minced
1 lb red potatoes chopped into 1/2 cubes
1 C loosely chopped kale
1 tbsp olive oil
salt and pepper


Shuck Corn and place cobs directly onto burners of gas range (if you have an electric oven follow these instructions to oven roast corn, if you have a grill- grill the corn you lucky duck), light and adjust until the flame touches the corn, but is not engulfing it. Turn often and move cob around burner (with tongs or corn stalk handle) until at least a bit blackened on all sides. This does not have to be even or at all uniform (see above photo for reference). Let cool a bit then cut kernels away from the cob. I do this by standing up my corn cob then using a large sharp knife to cut the kernels away form the cob downward strokes, cutting as close to the cob as possible. Save corn cobs for later use in soup. Place corn kernels in a bowl and set aside. 

To roast the peppers, use the same method. Place the peppers directly on a gas burner and adjust flame until just licking the peppers, use tongs to turn often- the peppers will cook much faster than the corn. Or grill your peppers, or oven roast them (400 degrees, 15 minutes, check on them a fest times)
 I find they peel easiest later on if you roast them until the skin is pretty much all blackened. After the pepper finished cooking, immediately put it in a heat safe container and cover with lid for five minutes, this will make the pepper sweat and loosen up it's skin even more. 
Peel the peppers, slice them open and remove seeds, and chop peppers into 1/4" pieces. Set aside for now. Now wash your hands before you accidentally touch your face or eyes with pepper fingers. 

If your sausage came in a casing (in link form), remove meat from casing, I use a sharp knife to cut open one end then squeeze it out of the casing like I'm emptying a tube of toothpaste. Add olive oil to the bottom of a large pot (the one you'll be making the soup in), turn heat to medium, and add sausage once oil heats, cooking  about 5-7 minutes. Remove meat from pot with slotted spoon and set aside, then drain all but 2 tbsp grease from the pot. 

Add garlic and roasted peppers to the pot with the remaining sausage grease, turn to medium-low and cook until garlic is soft, about 3-4 minutes. Add the cubed potatoes, mix to distribute garlic and peppers throughout the potatoes, then add the chicken broth and corn cobs (I break mine in half), and some salt and pepper, and bring to a boil, then reduce to a low boil and cook until the potatoes are soft all the way through when poked with a fork. 

Add the corn, sausage, and kale, then cook another 10-15 minutes. Add the heavy cream and cook until soup reaches your desired thickness, 10-20 minutes. 
I find that my favorite soups are long form slow cooked soup, so consider my cooking times a minimum, with an aim to make this cookable after work, but if you have all day, by all means slow simmer it for 45 minutes after it all comes together. Stir occasionally, cook low for a long time, the soup will get thicker and the flavors will deepen and blend, like a classic soup your grandmother would spend all day cooking.


Tuesday, August 13, 2013

Strawberry Mozzarella Salad


A few years ago S and I discovered a lovely little restaurant in Brooklyn called Traif. They serve an ever changing array of small plates, with a pretty heavy focus on pork. Which is a meat I love. They serve these strawberry cinnamon baby back ribs that make me want to weep with joy.Their crispy berkshire pork tails are the stuff of my food dreams. 


But I digress, I bring up Traif because aside from all their lovely pork dishes, they also serve a lovely strawberry mozzarella salad we've enjoyed several times. The fresh, creamy mozzarella pairs with strawberry easily (everyone knows strawberries + cream = yum), and the greenness of the mint and the tangy, slightly savory balsamic bring it around to a flavor that is a little sweet, but still firmly grounded in salad, not dessert. 


For our anniversary this year S cooked up a lovely chicken and white wine rice pilaf casserole, and for an appetizer he recreated the strawberry mozzarella salad from Traif. Neat little slices of mozzarella, each with a perfect strawberry slice on top, a single tiny mint leaf, and a drizzle of fig balsamic vinegar. They were dainty and lovely, a perfect recreation. 


What I present to you today is not the perfectly neat version of the Traif salad S created, which is lovely, but rather a slightly more casual, rustic take on it, which lends itself well to family style dinners, barbecues, or on it's own as lunch the day you make it for your blog. It's incredibly easy, comes together in moments, utilizes seasonal strawberries, and requires no cooking, the perfect summer dish.

Strawberry Mozzarella Salad

16 oz strawberries
3/4 lb fresh mozzarella
1 small bunch mint
Balsamic Vinegar for drizzling

Cut mozzarella in 1/3 inch thick slices and place on the bottom of serving dish. Hull the strawberries and cut lengthwise into thick slices, then cover the mozzarella with the strawberry slices. I use slightly more strawberries than cheese. 

If you're using small mint leaves, just scatter them over top. If your mint leaves are larger like the ones my apple mint plant grows, cut them into thin slivers before scattering over the dish of strawberries and mozzarella. 

Immediately before serving drizzle some balsamic vinegar over the salad. I prefer to use a sweeter, slightly thicker, more aged vinegar. If you want to thicken and sweeten a thin balsamic, see my note at the bottom. 

Serve as an appetizer or side salad, basically any time you would serve a Caprese Salad. 


Note: To thicken a thin balsamic, pour 1/2 Cup balsamic into a frying pan with 1 tbsp sugar and cook over medium high, while stirring, allow balsamic to bubble and boil away for a few minutes until it thickens a bit. It will thicken more once cool so don't over do it. 3-4 minutes should do it. 

Thursday, August 8, 2013

Garlic and Blue Cheese Pull Apart Bread


I love blue cheese. Ok, in reality, you'd be hard pressed to find a cheese I don't love, but blue cheese is certainly one of my favorites. I love it on salads, in dips, with steak, on a cheeseburger with bacon, stuffed inside baked figs, any myriad of ways, really. I'm especially fond of Roth Kase's buttermilk blue. It's domestic, which is something I aim for whenever possible with food, it's loaded with crumbly pockets of blue mold, is not too wet and soggy, and it has a perfect balance of creamy and funky flavors. 


I mean, look at that gorgeous crumbly mold. Both the creaminess and the tangy, funky, blue flavor of the cheese is well showcased in this delightfully simple pull apart bread. The garlic and hot sauce are like added bonuses to what was already a winning combination- butter, blue cheese, and bread.  

I had a boyfriend in college who introduced me to the concept for this dish when he brought it to a party we were attending, and I ate pretty much all of it. I don't remember the party- whether it was a party with friends or with family, what went on, or even whether it happened in Ohio, New York, or Washington. All I remember is the blue cheese pull apart bread. It is that good. His version was spicier and lacked the garlic, but the idea was the same, butter coated biscuits all stuck together with blue cheese and hot sauce. Like a savory monkey bread. I started working on my interpretation of it shortly after college and after many delicious interpretations (you really can't mess this stuff up), I've settled on blue cheese, garlic, hot sauce, and red chili pepper flakes as my favorite toppings. 


This is a great dish to serve at a dinner party, I like to pull it out of the oven a few minutes after the first guests arrive and put it on the kitchen table for everyone to snack on while we wait for the inevitable latecomers. Plus, putting it on the kitchen table guarantees I can eat half of it while I finish up the rest of the cooking. 


1 tube of instant biscuits (I've used Pillsbury Buttermilk and Immaculate Baking Co Buttermilk Biscuits)
5 Tbsp Butter
3/4 C crumbled blue cheese
1-2 tsp hot sauce
1 tsp red pepper flakes
4 cloves garlic minced

Preheat oven to 350 degrees fahrenheit.
Coat pan (I used a round anchor hocking dish, you could use a loaf pan, a small bundt pan, a square cake pan, just about any pan will do) with small amount of butter. Melt the rest of the butter in a small dish, add the hot sauce to the melted butter and mix.

If using the smaller Pilsbury biscuits, cut each biscuit in half, if using larger rolls of biscuits, cut each biscuit into quarters. Dip the individual pieces into the melted butter/hot sauce then place in pan, after you've covered the bottom of the pan in a single layer of biscuits (about 1/2 the biscuits), add a layer of cheese, minced garlic, and red pepper flakes (using about 1/2 all the toppings). Make second layer of butter dipped biscuit dough, and add the rest of the cheese, garlic, and red pepper flakes. I find this recipe works best if executed in two layers, but more or less will still work. 

Place dish in oven and bake 30-40 minutes, or until the biscuits take on a pretty dark golden brown hue. You want to wait until it's really a pretty dark gold to guarantee your middle biscuits cook all the way through. 

Remove from oven and allow to cool about 3 minutes, or the butter will burn you when you pull  off a piece. Pieces should easily come apart when pulled with fingers. I serve mine whole and let folks pull it apart with their hands to get pieces. 


Share on Tumblr