Saturday, June 29, 2013

Cherry Strawberry Crisp


So last weekend was the only New Amsterdam Market of the season, which is heartbreaking for me, as in the warmer months the market is a mainstay of my grocery shopping and S and I have spent many Sundays there. This also meant it was my only chance to snag some Flying Fox fruits. Maggie Nesciur, the frutier behind Flying Fox drives all over the region gathering some of the best seasonal fruits I've ever had. For the only market of the season she brought a large variety of cherries.


I brought home some sweet and some tart, and each was more delicious than the last. While tart cherries are typically considered the baking cherry, I love their tartness, and their soft juicy flesh, and consequently ate most of my tart cherries and baked this crisp with the sweet ones.


I also picked up some strawberries from Fingerlakes Farms, fresh little strawberries always remind me of the patch of tiny strawberries that grew in my childhood backyard, sweet and soft and warm from the sunshine, I loved to eat them right off the plant.


Since I ate so many of my fruits raw, I decided to pair up the remaining strawberries and cherries.


Into a delightful, super simple crisp. Feel free to sub in different fruits according to what is seasonal in your part of the world. Raspberries, apples, peaches, and plums all make lovely crisps!

Cherry Strawberry Crisp: 

1.5 C pitted sweet cherries
1.5 C quartered strawberries
1 1/4 C Brown Sugar
6 Tbsp Butter- chilled
3/4 C Flour
3/4 C Rolled Oats

Preheat oven to 350 Degrees Fahrenheit.
Grease casserole dish or pyrex pie pan lightly, and add cherries, strawberries, 1/2 C brown sugar, and 1/4 flour, mix to combine evenly and set aside. 

In small bowl combine butter, 1/2 C flour, 3/4 C brown sugar, and rolled oats. Using pastry cutter, two forks, or (my favorite) your fingers combine ingredients into a crumbly mixture. 

Top fruits with the butter/oat/sugar/flour mixture, you don't have to worry about doing this perfectly evenly, just sprinkle your chunks of topping all over the top until you run out.
Bake 20-30 Minutes, or until topping is golden brown. Let cool about 5 minutes before consuming.
It's especially delicious with my Coconut Whipped Cream on top!
Share on Tumblr


Wednesday, June 19, 2013

Watermelon Salsa by the Sea.


S and I spent the last week in Cape Hatteras in the Outer Banks. My father and his friends are a into windsurfing and kitesurfing, and have been coming down to Hatteras since the 1980's. They also know how to throw a week long party- lots of good food and a myriad of booze. 


There was sushi, made with fresh locally caught seafood delicacies- the oyster was especially nice.


I did a bit of windsurfing. I learned as a child, but it had been a long time. When I was very small I used to sit indian style on the front of my fathers windsurfer and he'd sail straight out into Lake Erie. Doing the sailing yourself is a fair amount tougher!


Oh, and we explored an abandoned amusement park. Which was pretty neato.

Anyway, on to the Watermelon Salsa!


This is my father's recipe, it's very fresh and summery tasting, the sweetness of the watermelon balancing out the spicy jalapenos.


Over the course of the week my father made two or three batches of this, and one of mango salsa, all of which were a huge hit.


Watermelon Jalapeno Salsa

1/4 medium large watermelon (about two cups)
2 Jalapenos (one if you like it more medium spicy)
1/2 red onion
3/4 cup rinsed and dried cilantro
Juice of 1-2 limes
Salt and Pepper to taste


Chop the watermelon into 1/4-1/2 inch cubes, and add to large bowl. Chop the jalapeno and onion  finely, add to bowl. Add lime and cilantro. 
Mix, then taste and add salt and pepper according to taste. 
Let sit 15-20 minutes to bring out flavors, mix again, and serve.
The sweetness of watermelons varies with ripeness, so be sure to taste as you add the salt and lime to adjust accordingly. 


I just couldn't resist sharing one last photo of the abandoned amusement park. This place was definitely open last time I was in Hatteras, ten years ago, and now it's being reclaimed by nature pretty rapidly.
Share on Tumblr


Wednesday, June 5, 2013

Sharp Scape Pesto, and Pesto Roasted Chicken.


Pesto. It's so simple and so rewarding. Creamy, sharp, herby, and made without any heat- it's the perfect spring topping for all manner of dishes, from potatoes, to pasta, to chicken, to lentils (seriously, I had lentils and pesto today and it was awesome). 
 Take a bunch of green things, some cheese, olive oil, lemon, maybe some nuts, and blitz it into a rustic puree. Usually when making pesto I don't use any measurements, but for the sake of this recipe, I measured as I went along. Basically, what I'm saying is you can feel free to play around with the measurements, as well as the ingredients listed. After all, this is a pesto yet it doesn't call for any basil, which is a staple of traditional pesto. So feel free to add or subtract green leafy things as you see fit. 


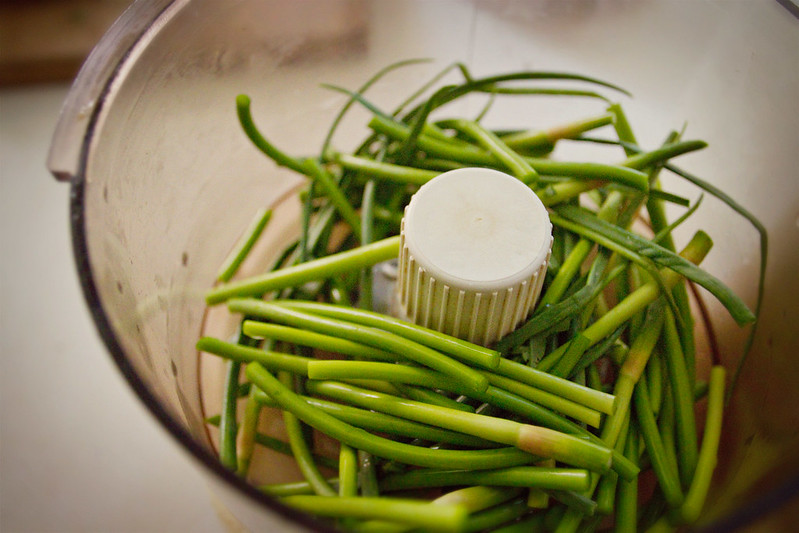
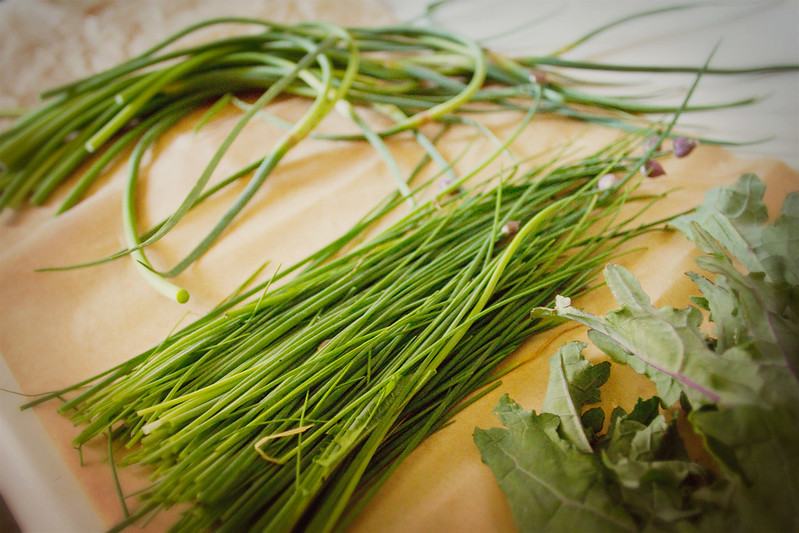
Garlic scapes- I could write odes, sonnets, whole novellas even, devoted to my love of the garlic scape. Scapes are the stalk of the garlic plant, the part which grows above ground. They're typically removed to encourage the plant to grow a large garlic bulb beneath ground, and are most commonly found at farmers markets and grocery stores from late spring through early summer, though here in nyc I can usually find them all summer. They're creamy and garlic-y but not overpowering. They make a lovely side dish roasted or sauteed on their own, but are also an incredible ingredient in dressings and soups, as well as in wilted vegetable salads. 


Onion chives are the smallest edible species of onion, and their little grassy blades topped with tiny purple flowers are delightful, like a springtime green tasting, not-too-strong onion, with a hint of garlic. Together with the gentler scapes and earthy kale, they make a sharp, flavorful pesto.


And the hard cheese softens it all, just a bit. 


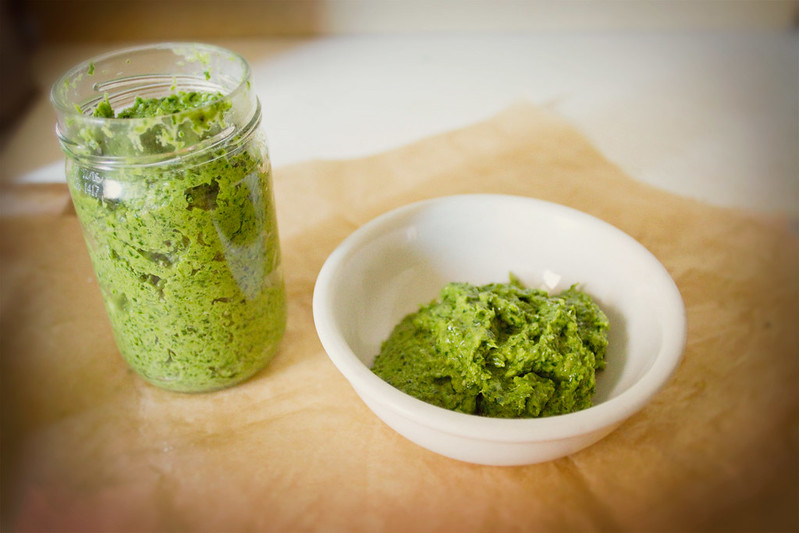
There is something so lovely and happy feeling about a jar of fresh made, earthy, sharp green pesto. It's lovely smeared right out of the food processor and onto fresh french bread


From this batch, I used a 1/2 cup for my chicken, and saved the rest (about another 10-12ozs) for meals later in the week. It was delicious on penne with some fresh grated romano cheese over top.


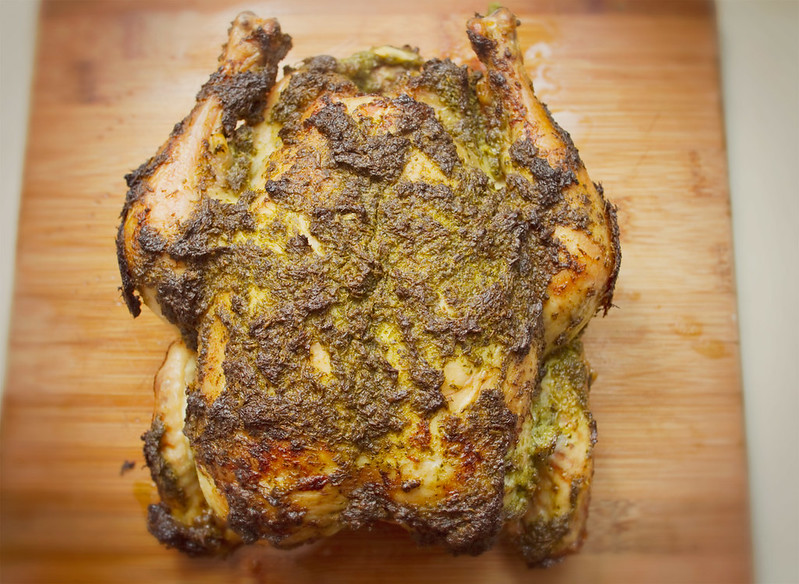
I love roasted chicken. It's so simple and you can modify it so many ways. Garlic, beer, pesto, lemon-butter, most things taste good on roasted chicken.


I've been kind of loving the way the inside of my oven photographs.
 Aside from the filthy bottom that is.


The pesto will brown up in the oven, but never fear, you've not burned it! That brown herby topping is delicious. 


Sharp Scape Pesto

20 Garlic Scapes (10-15 if they're large ones)
1 Bunch onion chives (about 1 cup)
1/2 Bunch red russian kale (or any type of kale)
Juice of 1 lemon
1/2 Cup olive oil
1/4 Cup hard cheese such as romano

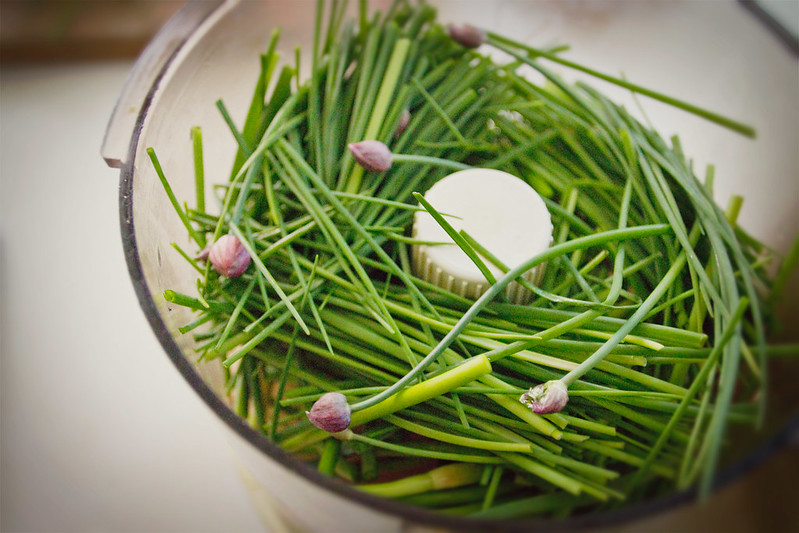
Use the food processor to grate your hard cheese- put it in as a block and blitz until grated. Wash all leafy greens. Chop the garlic scapes so they fit in the food processor, and add them, the onion chives, and the kale to the bowl of the food processor, squeeze the lemon over top, pour in the olive oil, and blitz. 
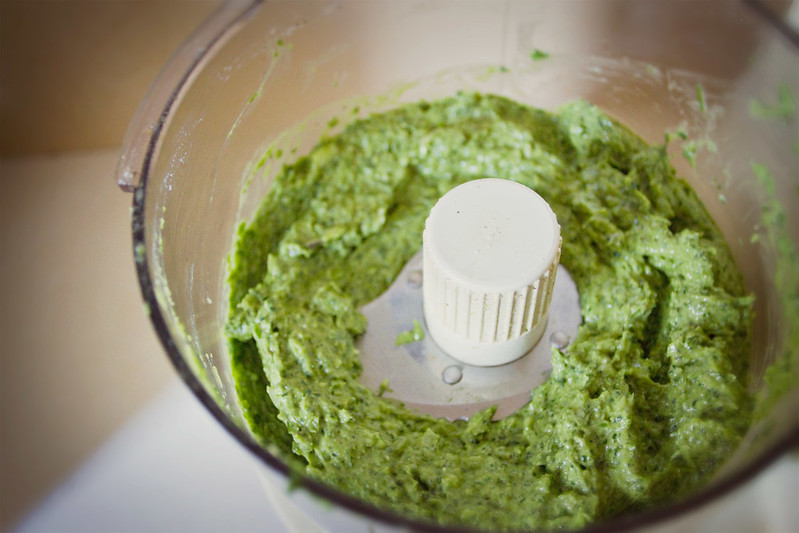
Run food processor (or blender, or vitamix) until the pesto reaches desired consistency. I like mine to be pretty smooth, but with some texture still, like a rustic paste. This takes my food processor about 3-4 minutes, but it's from the 1970's and only has one speed, so keep an eye on your pesto while it blitzes. 
When it's done food processing, pour into a jar, or directly on to pasta, smear it on bread, use it as pizza sauce, or make the pesto roasted chicken below.
This pesto can probably last a week or so in the fridge- but we ate ours in two days flat, once on chicken and once on penne.


Pesto Roasted Chicken

1 3.5 lb Chicken (or desired size)
1/2 Cup Sharp Scape Pesto, recipe above
1/4 Cup softened butter
10-12 Garlic cloves
Salt and Pepper to taste

Preheat the oven to 450 degrees Fahrenheit 
Peel then crush the garlic cloves with the broad side of your knife, and stuff them in the cavity of your chicken. If you'd like to truss the chicken, go ahead and tie it up. I find the birds I buy at Whole Foods never need any trussing to keep the legs close. 
Combine the softened butter and the pesto in a bowl, mixing until the butter is thoroughly incorporated into your pesto. Place the chicken in a lightly buttered roasting pan, and rub all over with the pesto-butter mix. I gave mine a fairly heavy coating, using the whole bowl of pesto and butter, but how all out you go covering the bird is up to you. Feel free to go wild and  really cover that bird. Add a sprinkling of salt and pepper over top.
Place the roasting pan in the preheated oven, cook 20 minutes, then turn the oven down to 350 degrees fahrenheit and cook 20 minutes per pound, or until thermometer inserted into inner thigh reaches 165 degrees Fahrenheit. I don't have a meat thermometer, but the above method has never failed to produce a perfect chicken in my oven, even without checking the temperature. 
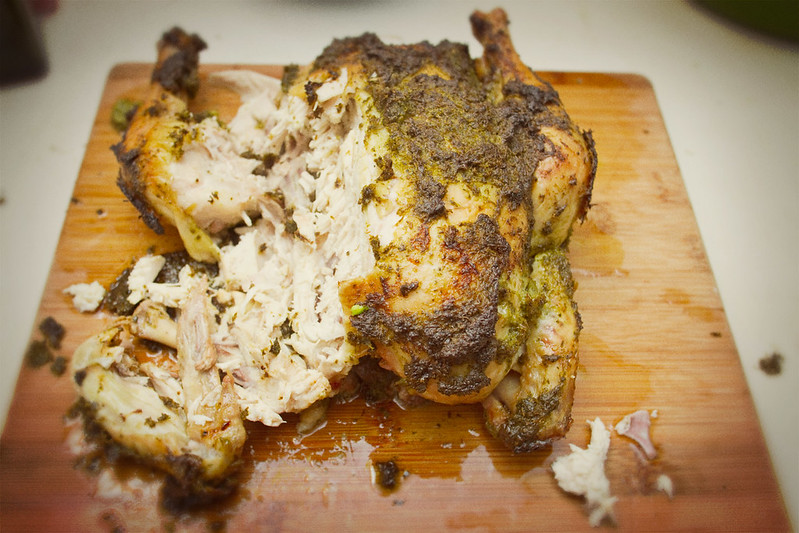
Remove chicken from oven and let sit a moment or two before carving. 
Enjoy! 


Substitutions: 

Pesto: 
For the greens- any other leafy, flavorful green would probably work, certainly you could use basil, or replace the kale with arugula, or the scapes with regular garlic. Dandelion greens would probably make for a super-sharp and lovely pesto. Ramps would also work really well, greens and bulbs.
For the cheese- I used Romano, but Asiago, Parm, Dry Jack, or any other hard cheese would work wonderfully.
Chicken: 
You could certainly substitute any pesto for the one I've listed above. 


Our chicken was ripped apart and devoured on the spot. I used the bones to make a fantastic batch of slightly-herby chicken stock in the slow cooker.


Share on Tumblr

Tuesday, June 4, 2013

Sunshine Beet Popsicles


When I moved to the west coast part way through college I could only bring what I could fit in my 1998 Chevy Cavalier (four door, atleast!), along with all of my then-boyfriend's belongings, our camping and skiing gear, and ourselves. In short, we couldn't bring much. Luckily our new town had a large Goodwill which had a well stocked and eclectic selection of house supplies. It was there, on our first west coast Black Friday that we found a relatively new looking Hamilton Beach juicer in working condition. It was 50% off of $7! $3.50! Imagine our excitement. We lived near a farm stand with tons of cheap produce! It was perfect. We took it home and assembled it in our dorm apartment. The pulp it spit out was a bit wetter than ideal, it was loud, and definitely didn't spit out an amount of juice comparable to the amount of fruit we put in, but it worked! 


We became juicing fanatics. We made giant glasses of morning orange juice requiring over 6 oranges, we made orange-lemon-ginger tequila cocktails. We'd sit in our garden, sticky orangey fingers clutching tall glasses of orange-carrot juice. We never delved far beyond citrus, carrots, and apples, but we certainly made a ton of juice.


When I graduated from college and decided to move back to NYC I sacrificed the juicer to my ex, among many other incredible Goodwill finds, because he was staying, and again, I had to fit everything in my Cavalier. After moving to the city I discovered the joy of fruit and vegetable juices, and every time I shelled out $6+ for a 16oz wheatgrass-pineapple-beet juice I would mourn the loss of my crummy little Goodwill juicer.


So when my mother called a few months ago and told me she found a nice looking juicer on Groupon, and would I like it? I jumped on it. OF COURSE I want a juicer. It's the Dash brand Tall Slow Juicer, and it's incredible. The pulp is dry, and you get a good amount of juice per piece of fruit. I am back in juice heaven, but this time with a lot more variety. Beets, spinach, mint, wheatgrass, I've been trying to diversify my juicing.


Anyway, I figured why stick to juice? I love popsicles! Especially People's Pops, who make delicious fresh fruit popsicles and sell them at local farmers markets. I decided to make my own fresh fruit juice popsicles, then I looked at my fruit bowl and saw these lovely golden beets. And carrots. I just couldn't resist the idea of sweet vegetable popsicles!


I happen to have popsicle molds, but an ice cube tray covered with tin foil, and toothpick popsicle sticks also works well for mini-popsicles. I haven't tested this theory, but I am fairly certain one could feed these to popsicle loving children and never tell them there were any vegetables enjoyed. 


Yum! The oranges provide some upfront tangy-ness, and the sweetness of the raspberry rounds out the earthy notes of the beet. These are definitely sweet enough for kids, but with a flavor complex enough for adult enjoyment, and the color is lovely, bright-fuchsia-red-orange.


Sunshine Beet Popsicles
Makes 6-8 popsicles, depending on mold size.

2 Golden Beets
3 Oranges
3 Carrots
1 Heaping cup Raspberries

Cut beets and carrots into chunks of the appropriate size for your juicer (or food processor- though I recommend you strain the final product prior to freezing if using a food processor). Jubilee oranges by cutting off top and bottom so they sit flat, then cutting away the peel and pith. Juice all fruit and pour into popsicle molds or ice cube tray. Cover with lids or tin foil (if using ice cube tray, poke toothpicks through the foil of each one as popsicle sticks).

Freeze for 4-6 hours, until solid. Remove from mold and enjoy immediately. 
These will probably last a while in your freezer, seeing as they are frozen, but they're so tasty chances are you'll devour them all in a matter of hours.