Wednesday, July 31, 2013

Blueberry Cardamom Lemonade Popsicles


So, clearly I love popsicles. I've done beet pops, and honeyed peach yogurt pops, and now I am bringing you these blueberry gems. I just can't resist- it's hot out, I have these lovely popsicle molds, and it's so easy to make lovely, delicious frozen treats. 


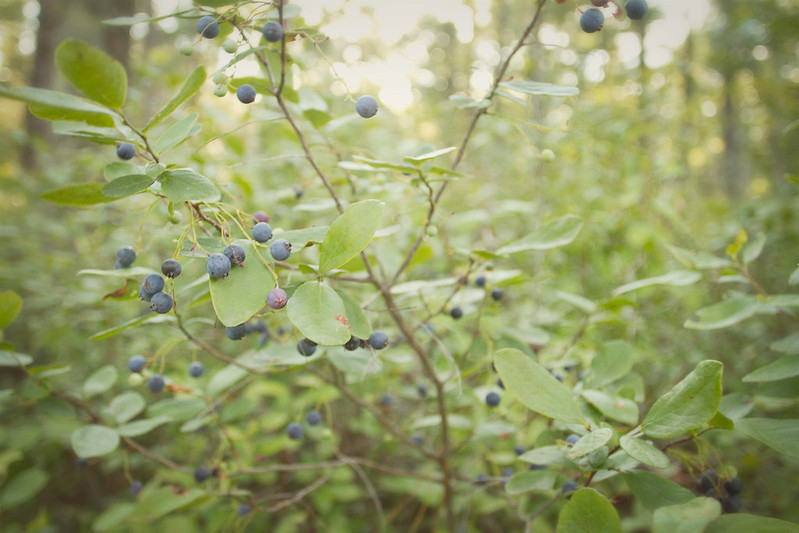
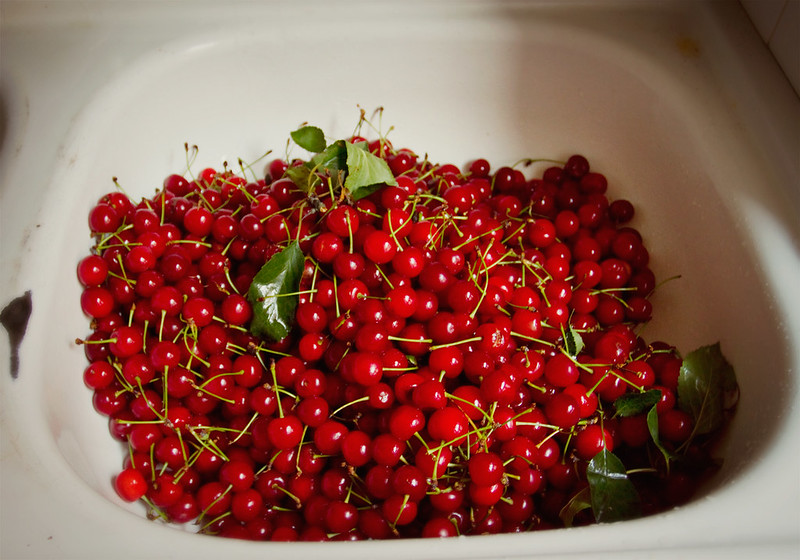
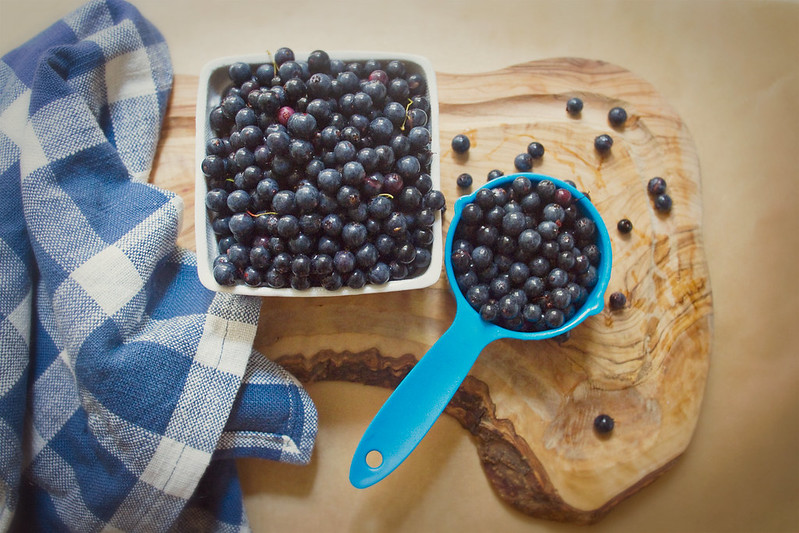
Also, S and I went camping in the New Jersey Pine Barrens last week and our campground was absolutely full of blueberries. Naturally we picked about 4lbs of the delicious little berries. They are heavenly, tiny little things, reminiscent of Maine blueberries.


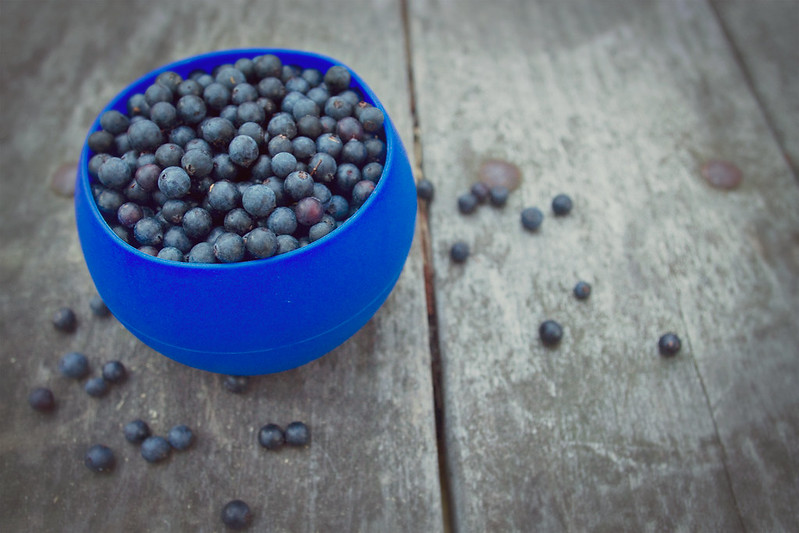
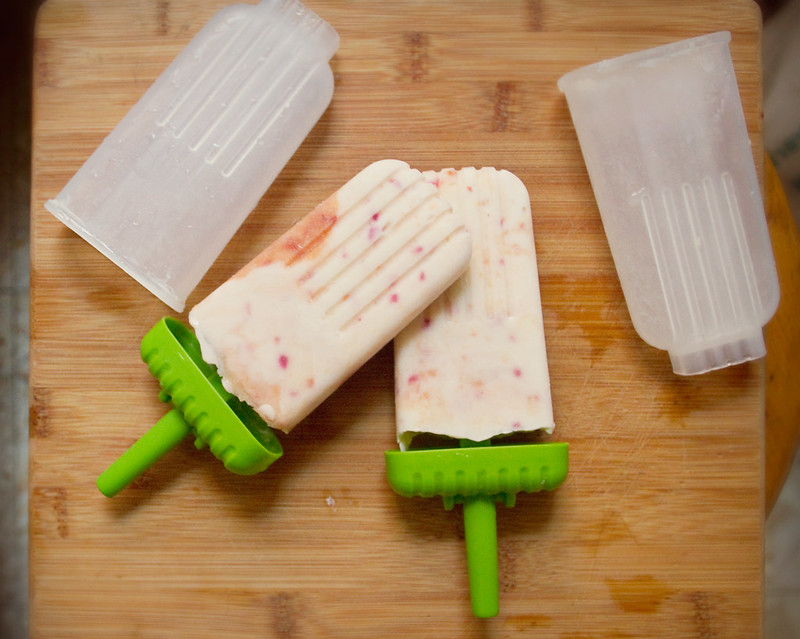
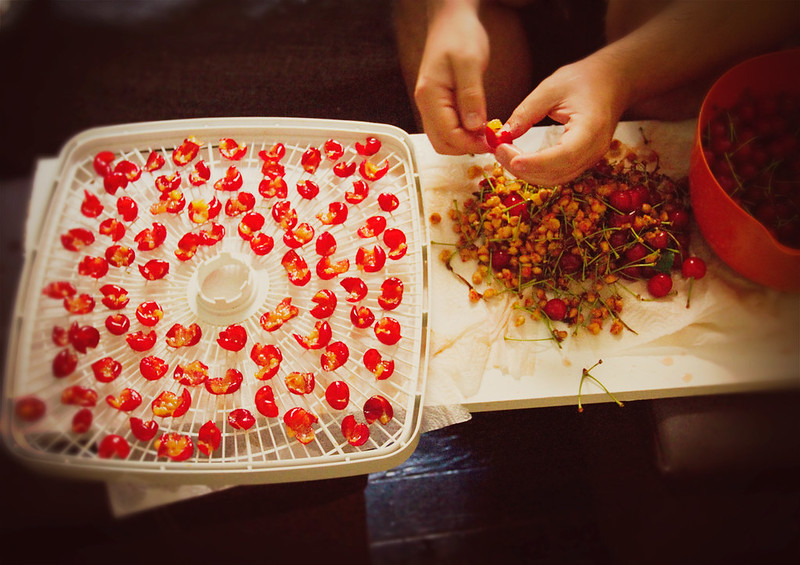
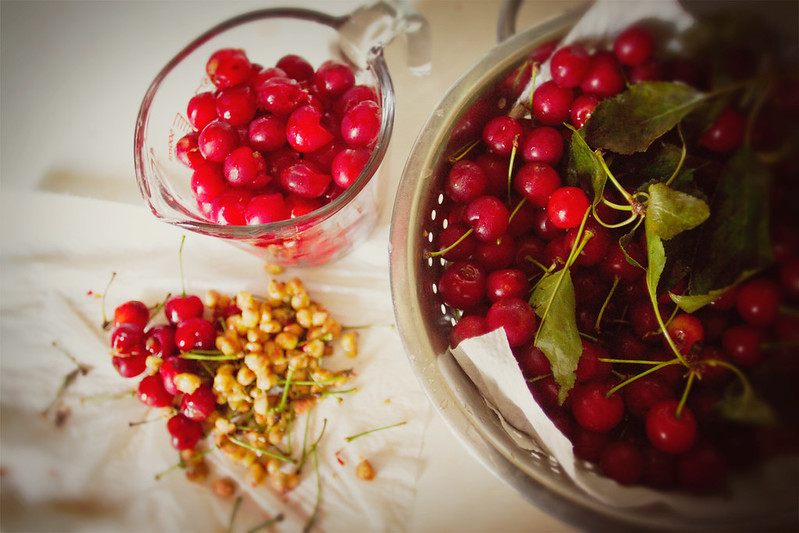
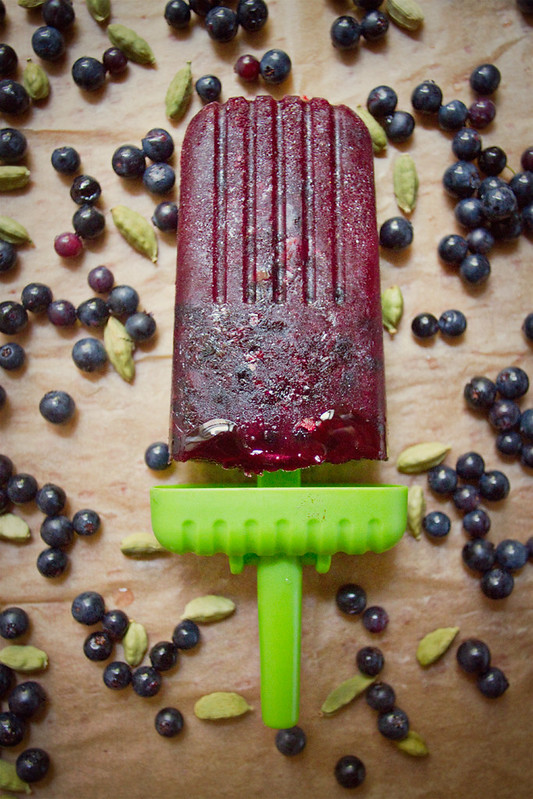
I froze half of them intact, to save for winter along with the frozen cherries and peaches we picked earlier in the season. Some berries we ate plain by the handful, staining our hands and mouths purple, and some I turned into these Blueberry Cardamom Lemonade Popsicles. They're sweet and tangy and the cardamom adds a lovely spice twist.


I love cardamom. It has a heavenly smell as you grind it, each pod is incredibly aromatic. 


In truth, I already have another batch (or two, or three) of popsicles planned for the coming weeks. 


Actually, there is a new flavor combination in my freezer right now. I am definitely a popsicle addict. 


Blueberry Cardamom Lemonade Popsicles

1/4 cup honey
1 Cup water
2 tbsp sugar
6 Cardamon pods
Juice of 3 lemons 
2 cups blueberries


Crush cardamon pods with mortar and pestle and add to small saucepan with water, sugar, and honey, bring to a boil then reduce to low heat and simmer about 10 minutes, stirring occasionally to allow the cardamon to infuse into the honey and water mixture. 


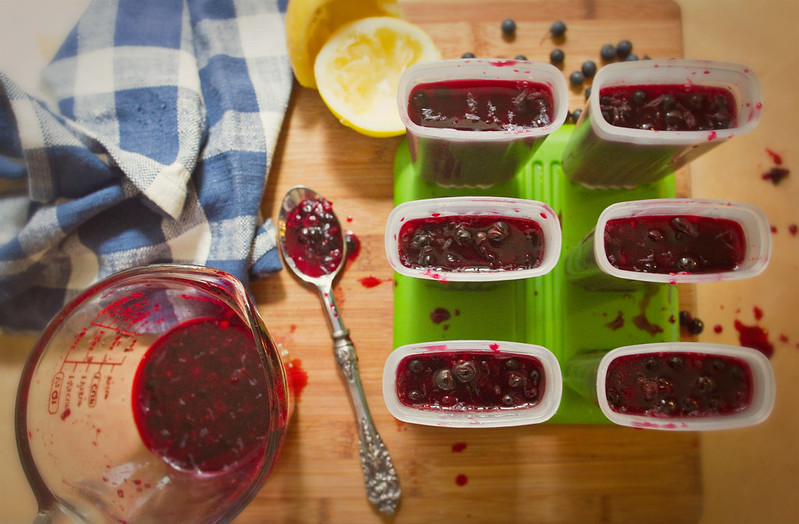
After 10 minutes, pour the honey water through a fine strainer into a heat safe bowl or large measuring cup, to strain out all but tiny pieces of the cardamon, then return the honey water to the sauce pan and add the blueberries. If using frozen blueberries you may want to set some aside to add back into the popsicles whole, if using fresh blueberries, some of your berries should hold their shape on their own. 

Turn heat to medium and cook, stirring often for about 5 minutes, or until many of the berries have split and the liquid is dark purple. Remove from heat and add the lemon juice. Stir well, then allow to cool a bit before filling the molds. 

I find a standard measuring cup works well to fill the molds, but the little blueberries will splash around a bit no matter what while you fill. The reason I allow my mixture to cool before filling the molds is to avoid pouring hot liquid into plastic molds, but if you have metal molds then you're lucky, and also probably fine to fill them while the mixture is hot. Make sure to leave some room for expansion while the pops freeze. Freeze for 8-10 hours. If your molds are anything like mine I recommend running hot water over these for bout 30 seconds before removed from mold. 
Share on Tumblr

Monday, July 29, 2013

Chocolate Caramel Custard with Candied Bacon


In our apartment the first time I tried to make caramel sauce is referred to as Caramelgate because in the course of one night I tried, and failed, to make caramel sauce three separate times. It just wouldn't come together, the sugar would caramelize but then I would add the cream and the two parts just wouldn't combine, the caramel would solidify and the cream would pool all around it, pitifully.


I had to scrub the hot sticky caramel out of my beloved green frying pan three times, the solidified sticky mess seeming to mock me as I scrubbed as it angrily. There may or may not have been tears after the third attempt, mostly from S because without caramel sauce dessert was just apple slices (who am I kidding, of course it was me who cried over caramel).


Eventually I mastered the art of the caramel sauce (the cream was too cold and I was pouring it too fast), but no matter, the caramel in these amazing custards is a much simpler recipe than my usual caramel sauce, an incredibly simple one in fact. It's a very slightly modified take on Ree Drummond's Caramel Sauce, and it's delightfully easy and super rich.


If you've never made candied bacon you are in for a treat. Coating something in brown sugar and cooking it until it caramelizes pretty much makes any food ten times more awesome, but bacon especially benefits from this treatment, the becomes crisp and sticky on the outside and the bacon/brown sugar flavor combo is unspeakably heavenly.


Pretty much every component of these custards is rich. The custard is thick and deeply chocolatey, the caramel is dark and complex, the bacon is sweet and salty and sticky. Basically, what I'm telling you is these are heavenly little bowls of chocolate-caramel-bacon paradise. They're a little labor intensive, but definitely not difficult, and the end result is more than worth the effort. The custard base is a modification of this chocolate custard. This made about 5 puddings in my little ramekins.


Caramel:
1 packed cup brown sugar
1/2 cup heavy cream
4 tablespoons butter
Pinch salt

Custard:
1/2 cup milk
4 tablespoons brown sugar
2 large egg yolks
5.3 ounces (1 bar) bittersweet chocolate, finely chopped, plus shaved chocolate, for serving
Pinch of salt
4 tablespoons unsalted butter, softened

Whipped Cream:
1/2 Cup heavy cream
1-2 Tbsp Powdered Sugar

Candied Bacon: 
3 strips bacon
1/3 Brown sugar


Caramel:

Start by making the caramel sauce. Add the cream, butter, and brown sugar in a saucepan and combine over low heat, whisking until the butter melts and the brown sugar breaks up into the milk, then turn heat to medium and cook 5-7 minutes, whisking continuously, until sauce thickens some, keep in mind it will thicken further in the fridge so you don't need to cook it until it's super thick, think real maple syrup thickness, not honey. Remove from stove, pour in heat safe container and refrigerate while you make the custard.


Custard:

Separate eggs from yolk, my method is to crack the egg, separate the halves with the contents in one, then shift the yolk back and forth from one eggshell half to the other, letting the whites fall into a bowl beneath. Place yolks in medium bowl, set aside.

In small sauce pan bring the brown sugar and milk to a light simmer and mix until sugar dissolves. Slowly whisk the sugar-milk combo into the egg yolks, whisk until combined, then pour mixture back into sauce pan, and return to medium heat, whisking until it thickens slightly- about 3 minutes.

Remove mixture from heat and whisk in the chopped chocolate, whisk until chocolate is melted, then add butter and whisk until well incorporated. Pour mixture into medium sized bowl and place in fridge for 45 minutes.

After 45 Minutes remove bowl from fridge and drizzle about 1/2 the refrigerated caramel sauce into the bowl of custard while slowly mixing to create a caramel swirl. Spoon or pour into custard dishes or ramekins and refrigerate 45 minutes-1 hour.

Candied Bacon: 

Preheat oven to 325 degrees fahrenheit.
While custard cools in fridge, coat the bacon slices with brown sugar on both sides until well covered. I press the sugar in a bit with my fingers. If you have parchment paper, cover the bottom of a jellyroll pan with it, otherwise, place sugar coated bacon directly on jelly roll pan.
Bake in preheated oven  for 15-20 minutes, or until sugar is caramelized and bacon is cooked through. Remove from pan while hot and cool on plate or wire rack. The sugar will solidify while cooling making the pieces nice and crispy.
When well cooled, chop bacon into small pieces to top custard with.

Whipped Cream: 

Place 1/2 Cup heavy cream and 1-2 (depending on your sweetness preference- I like just 1) tablespoons powdered sugar in mixing bowl, or bowl of your stand mixer, and beat with electric hand mixer, or stand mixer until whipped cream holds soft peaks.

Before Serving:

Top ramekins with a bit of caramel, a sprinkle of candied bacon, a dollop of whipped cream, a caramel sauce drizzle, and another sprinkling of candied bacon. Devour immediately with immense joy.

I want to make about six more batches of this pudding and eat them all myself right now.


Friday, July 26, 2013

Summertime Strawberry and Candied Bacon Pizza


I stood in fruit section of whole foods inspecting quarts of organic strawberries yesterday, searching out the container with the freshest berries, not entirely sure what I was going to do with them, but certain I had to have them because they were so beautiful and plump and red, they had called to me from their display of berry boxes. They were too lovely, juicy and sweet, and sun-ripened looking, I couldn't resist. 


So then I set off, listlessly pushing my cart through the produce section. What would I make with these lovely, perfect berries? A strawberry, mint, mozzarella salad perhaps? S made that salad for our anniversary this year, a recreation of one we had enjoyed on my birthday a few years ago at Traif, but it seemed too fancy for a thursday night dinner where it was likely to be accompanied by Coca Colas and a few episodes of Orange is the New Black. 


But then my eyes landed upon the bin of shallots, and I thought of my favorite shallot-bacon pizza, and how wouldn't a lovely seasonal spin on that pizza be strawberries?


And then I decided to candy the bacon because why not. Growing up my father always rubbed our bacon with some brown sugar before cooking it on weekend mornings. Bacon is just better that way.


And thus this pizza was born. And it is a beauty. A Ricotta and Chevre base and a creaminess to the sweet-savory flavors of the toppings- sliced strawberries, candied bacon, caramelized shallots, slivers of lemon basil from my fire escape garden, and a balsamic reduction drizzled over top. The chevre, strawberries, and lemon basil all smack of summer freshness, making this a great seasonal pizza.


Summertime Strawberry and Candied Bacon Pizza

1 batch of dough (I cheat and buy it premade at Whole Foods, but I recommend Jim Laheys no knead dough if you're going the homemade route- it takes overnight though)
1 Cup Strawberries
1/3 Cup Fresh Ricotta (the soft stuff)
1/4 Cup Chevre or goat cheese crumbles
2 Medium Shallots
2 Tbsp Olive oil
1 Small handful Basil
1 egg yolk
2 Tbsp water
1/3 Cup Balsamic Vinegar
2-3 Bacon Strips
1/4 Cup plus 1 Tbsp Brown Sugar, divided

Preheat oven to 325 Degrees Fahrenheit.
First, candy your bacon. Rub each of your bacon strips down with the brown sugar, on both sides, until thoroughly coated. Place on a parchment paper (if you have it) lined jelly roll pan and bake 15-20 minutes, until bacon is thoroughly cooked and sugar has caramelized. Place on plate or wire rack to cool- the sugar will harden as it cools, making the bacon crisper. 

After removing the candied bacon, raise your oven temperature to 450 degrees fahrenheit.

Chop the shallots into fairly small pieces, add to a frying pan along with 1 tbsp olive oil, and cook over medium low heat until lightly browned, about 8-10 minutes. Set aside.
Remove the tops of the strawberries and slice them into thick round slices. Set aside. Thinly slice basil and set aside. 

Stretch your dough out on your pan, I don't own a pizza pan, so I used a lightly oiled jelly oil pan. Brush the stretched dough with the remaining 1 tbsp olive oil, then coat lightly and evenly with the ricotta cheese. Crumble the chevre over the ricotta, it doesn't have to be a perfectly even coating. Place sliced strawberries all over the pizza, sprinkle crumble bacon, caramelized shallots, and sliced basil all over the top of everything, and place in preheated oven. Cook for 8-10 minutes, checking on it occasionally.

While the pizza cooks, pour the balsamic vinegar (I used an apple balsamic) and the brown sugar into a heavy frying pan and turn stove to medium high. Cook, stirring frequently, until vinegar reduces slightly. It will thicken more when cool, so stop a bit before it gets too syrupy. 

When the crust is brown and the cheese is melty, remove pizza from oven, allow to cool about 4 minutes, then drizzle the balsamic reduction over top of the pizza. I like to get some on the crust, it's especially delicious. Serve warm and enjoy!


Saturday, July 20, 2013

Honeyed Peach Yogurt Popsicles


When S and I went Cherry picking a few weekends ago, the orchard also had pick-your-own peaches. We figured we would grab some peaches as well, so we emptied our buckets of cherries into the cooler, and headed out into the peach groves. But then we realized we didn't know anything about peach picking. You want to eat them when they're soft, but should you pick soft ones? We felt some- they were all firm. So we stood in the shade of some peach trees and googled. It turns out you want semi-soft, tree ripened peaches. Apparently, if you pick them firm they will never ripen properly. So then we set off, feeling peaches as we went, plucking any soft, ripe ones we came across. 


Having already picked 11lbs of cherries, and not wanting to run out of fruit storage space in our little kitchen, we picked about 20 peaches, and then cut ourselves off. When we got home, I chopped and froze about half of them and turned the other half into peach-cherry galettes, peach crisps, and these lovely honeyed yogurt peach pops. 


The honeyed peach flavor is sweet,slightly floral, and delightful, it reminds me of the American south- of the honey bees, hovering around the warm, sun ripened, sweet peaches hanging on the drooping trees in the humid, still, hot summer air. It's a great flavor combination for the heatwave we've been experiencing in Manhattan. The tangy greek yogurt adds a lovely, creamy twist to the sweetness of the honeyed peaches. 


Honeyed Peach Yogurt Popsicles

1 1/2 C Greek Yogurt
4 Peaches
5 tbsp Honey


If you want to peel the peaches go ahead, I don't mind fruit skin so I didn't bother, and they make lovely pink spots of color in the popsicle. Chop 3 peaches and place in food processor along with 2 Tbsp honey, process until smooth.

In a separate bowl, add greek yogurt and remaining 3 tbsp honey and mix until honey is fully incorporated, add a spoonful or two of the peach puree to thin the yogurt a bit and mix again.

Chop remaining peach into small, bite sized pieces.

Fill your popsicles molds, alternating one scoop of yogurt mixture, a few pieces of peach, then a layer of peach puree, another scoop of yogurt mixture, some peach bits, some peach puree, etc. until popsicle mold is almost full (leave some room for expansion while freezing!), put on your lid and popsicle sticks, and freeze for at least 8 hours to allow yogurt to fully freeze. 

If you don't have popsicle molds, you can use an icecube tray- fill each compartment, cover with foil, and stick popsicle sticks or toothpicks through the foil. You can also do this with dixie cups. Makes about 6 Popsicles.

Enjoy!
Share on Tumblr


Tuesday, July 16, 2013

Cherry Lime Rickey Chia Pudding


One thing I love about New York City is it's ability to time travel. If you know where to look in New York, you can very suddenly find yourself transported to the prohibition era (secret bars down underground alleys), or the seventies (shag carpets, avocado refrigerators) or, most commonly, the diner and soda fountain era of the 1950's-60's. From the aging chrome decor to the vintage headshots covering the walls, to the cans of Celray and jars of pickled eggs, in New York, it's pretty easy to find a diner that will take you back in time. My favorite feature of classic New York Diners are the drinks. A diner menu featuring Egg Creams, Chocolate Cokes, Malted Milks, and Cherry Lime Rickeys pretty much makes my day. 


I had never enjoyed a Cherry Lime Rickey before moving to New York, and some research has led me to believe they are a fairly local sensation (and also that Arizona is making a canned one now- ick). Comprised of 7 Up, Fox's cherry syrup, lime juice and a maraschino cherry, they are basically a jazzed up Shirley Temple, but let me tell you that squeeze of lime adds something remarkable. 


For this dessert, I took the classic sweet cherry/tart lime flavor of the Cherry Lime Rickey and paired it with creamy coconut and chia seeds. It's a good deal healthier, but if you've ever had a Cherry Lime Rickey, you will recognize the taste instantly. 


Chia Seeds are new discovery for me-  and from the first batch of pudding I whipped up,  I was hooked. Even after a whole weekend of eating my Chia experiments (Puddings and Chia juice drinks), S actually suggested I make a Mexican Chocolate Chia Pudding last night- which was awesome. There are many health claims about Chia, but I mostly like that it makes dessert super-crazy-easy to whip up while remaining pretty darn healthy. 


The amazing little Chia seeds can absorb up to 10x their body weight in liquid, turning them into little gelatinous beads of pudding-y goodness. They taste like whatever you soak them in, so they don't add any flavor to the pudding, just consistency. As for their wiggly consistency- I totally love it, it's like if the boba in bubble tea were teeny-teeny-tiny and tasted like pudding. 


Cherry Lime Rickey Chia Pudding

2 C Pitted tart cherries
1 13.5 oz Can of Coconut Milk (or 1 1/2 cups)
2-3 Tbsp Honey
1 Lime
1/2 C Chia seeds


Zest your lime on a zester, cheese grater, or microplane. I just bought a microplane and I am pretty sure it's the greatest nonelectric thing in my kitchen.

Add the coconut milk, lime zest, pitted cherries, and honey to the bowl of your food processor, and blend until fairly smooth (you'll never eliminate all the chunks of cherry skin- just accept them). 

Pour mixture into a bowl, add the chia seeds and whisk vigorously for about 1-2 minutes. Let sit at room temperature for ten minutes, whisk again, then cover and refrigerate at least 3 hours. Mix vigorously again before serving to break up any chia lumps. 

This is fantastic garnished with dried coconut flakes, or a mixture of lime zest and sugar, or some toasted almonds. 
Share on Tumblr

Wednesday, July 10, 2013

Brown Butter Tart Cherry Crumb Bars


On Saturday we went Cherry picking in New Jersey, and it was lovely. For S and me, getting out of the city is a bit of a production. I'm lucky enough to own the same car I've been driving since high school, a 1998 Chevy Cavalier named Midas, but a spot in a garage in the city costs nearly as much as my rent, so we take the subway to the LIRR then walk to S's mother's house where Midas lives in the driveway every time we want to go on an adventure. And getting the car back through the city when we want to go to New Jersey can be an adventure of its own. But it was worth it. So, so worth it. 


Have you ever been cherry picking? If not, I highly recommend it. The trees provide some lovely shade while you pick and there were SO MANY cherries on every tree! We snacked on some as we went along, enjoying the burst of tart/sweet sun-warmed juice while we picked alongside a family who stood two or three women to a tree laughing and chatting in Russian while the men lounged in camp chairs in the shade of cherry trees. There is probably only one week of cherry season left in New England, so if you live around here, go now! 


Seriously, there were a ridiculous amount of cherries on these trees. 
When I lived in Olympia, WA there were cherry trees in the park across the street from my house, and we pretty regularly gathered the cherries that grew wild there. They were also tart cherries, which I had never experienced fresh, previous to moving there, and from the first tree ripened, summer warm sour cherry I tried, I was totally hooked. 


S enjoyed the cherry picking as well, "More than I thought I would," he added. 


Tart cherries are much juicier than normal cherries, their flesh consistency is close to that of a large blueberry, or a very soft plum. Some people find their sourness overwhelming, but I like it, it's very summer and fresh tasting. 


Most folks use tart cherries for baking or canning. I have many plans for these beautiful cherries though.


I picked some to take home, in between mouthfuls of fresh ones. 


About 11lbs worth to be exact. We brought them home in a cooler, and processed them immediately, even before we took the car back to Long Island. 


First I set aside enough fresh cherries for three crisps, pies, or other desserts this week. Then we set up a pitting station in our living room (the kitchen isn't air conditioned and it was HOT this weekend) and pitted the other approximately 9lbs worth of cherries- by hand. A bit over half of them went into the freezer on racks then were transferred to bags once frozen solid, and the rest, like those in the photo, we put into the dehydrator to make my favorite dried fruit snack ever- unsweetened dried tart cherries.


The next day I pitted a more manageable heaping 2 cups, and made these heavenly Brown Butter Tart Cherry Crumb Bars. 


You could certainly make this with store or farm market bought cherries, no need to go directly to the orchard, though they'll taste better if you do! 


These are incredible. The brown butter adds a layer of complexity the already heavenly combination of crispy, oat-y, sweet crust and soft, tart baked cherries. 


If you're not adverse to dessert in the morning, they're also great the next morning for breakfast, if they last that long! 

Brown Butter Tart Cherry Crumb Bars


Crust:
1 1/4  C quick oats
1 1/4 C flour
1 3/4 Sticks butter - browned
1 tsp baking powder
1 C brown sug

Filling:
2 1/2 C tart cherries- pitted
1/3 C brown sug
2 tbsp flour
3 tbsp butter

Preheat oven to 350 degrees Fahrenheit. 
Line a baking dish in parchment paper or aluminum foil, and lightly grease with butter or oil (I used coconut oil). 

Combine cherries, 3tbsp brown sugar, and 1 tbsp flour, place in strainer over a bowl, to let some juices drain and prevent wet bars. 

Brown the butter- cut into smaller pieces and place in small saucepan or frying pan, melt over low heat and cook until the butter begins to turn golden brown and smells  nutty. As soon as I notice my butter browning I turn off my heat and mix the butter constantly, and it turns pale brown and smells like lovely buttery hazelnuts.

If you're good at double tasking, you can mix up the dry  ingredients while your butter browns, if not, do it after browning the butter- butter burns very quickly. Combine the oats, four, baking powder, and 1 Cup brown sugar in a medium bowl. Add the browned butter and mix until a coarse meal forms. Pour approximately 1/2 the meal into the bottom of the baking dish, spread out and press into an even layer, about 1/3 inch thick. 
Place in oven and bake about 15 minutes. 

Remove from oven and set aside to cool slightly. Add the remaining 1 Tbsp flour and 1/3 C brown sugar to the cherries in the strainer and mix to evenly combine. Pour cherry mixture over crust in baking dish, sprinkle remaining oat/butter/flour mixture over top until lightly covered. 
Place in oven and bake 25-30 Minutes, until topping is crisp. 

Remove from oven, let cool for 5-10 minutes, then remove from pan and place on cooling rack. Let cool completely (so difficult!) before cutting, approximately 15 minutes. 

Substitutions:
I imagine sweet cherries could be used if needed, but skip the straining step and cut down on the sugar in the filling.
Raspberries or Peaches could also probably be added or used in place of cherries if desired.


Thursday, July 4, 2013

Have a Delightfully Delicious 4th of July!


May your 4th be as delicious as it is delightful!


Some ideas for your holiday and a festive weekend:

Ditch the plain old potato salad and make a big batch of my Roasted Spring Vegetable Salad for your holiday picnic.

Have a big bowl of sweet and spicy Watermelon Salsa to tide over your barbecue guests while the meat cooks. 

Beet the heat with these Sunshine Beet Popsicles!

Throw some blueberries in with your Cherry Strawberry Crisp  and top with whipped cream for a red white and blue dessert! 

Happy Fourth of July!

Tuesday, July 2, 2013

Roasted Summer Vegetables


This is about as easy as it gets- fresh, seasonal vegetables, a bit of olive oil, some salt and pepper,   an oven, and you've got the perfect dish for a warm, damp summer night like those we've been having in New York this summer. 


I commented to the guy who runs the stand at Z Food Farms (and is in fact the father of the farms owner) that his little summer squashes were cute, and he informed me they're not just cute- they're better small. As they get larger, he explained, they get more seedy and woody. Indeed, these were nearly seed free, very soft, and delightfully sweet.


Z Food is probably my favorite veggie farm stand at my beloved, ill fated New Amsterdam Market.   The farm, in Lawrenceville, NJ is owned by David Zaback, and his stand at New Amsterdam is manned by his parents (and him some weeks), which seems to be a growing trend in the markets. When Maggie Nesciur of Flying Fox comes to New Amsterdam with her myriad of delightful fruits, her mother is always there too, sorting through the bins of fruit in their pickup and restocking the stands supplies. I love this multigenerational effort, especially in these instances where the younger generation is the spearhead of the project, with the parents helping out- it's like a reverse family business. 


The curly scapes and multicolored veggies make for a lovely presentation.


Roasted Summer Vegetables Recipe: 
Nothing in this recipe is fixed- amounts of vegetables, seasonings used, types of vegetables, it can all be changed very easily and with great success. These are just my suggestions. I recommend using a variety of types of summer squash- visually this will create a more colorful dish, but they also vary in flavor, my favorites are the roundish green stripey ones, while S likes the solid yellow ones best.

1 Bunch Garlic Scapes (about 15 Scapes)
6 Small Summer Squash (or 3 large) 
3-4 Young Onions
Olive Oil
Salt and Pepper

Preheat oven to 400 degrees Fahrenheit. 
Slice summer squash into 1/4-1/2 thick slices, all of the approximate same size. 
Cut spring onions into halves or quarters, depending on size.
If you want to cut your scapes to make them more manageable, go ahead. I left mine whole, for presentations sake. 
Toss all vegetables in large bowl with a bit of olive oil. Use remaining olive oil in bottom of bowl to brush pan, add vegetables to pan, and salt and pepper to taste.
Roast for 15-20 Minutes, or until scapes look slightly browned and everything is soft. 
Serve immediately.