Friday, April 26, 2013

Herb and Garlic Rubbed Lamb Loin Chops with Balsamic Reduction


I had never cooked a lamb chop before, and these delightful New Zealand lamb loin chops were on sale half off at Whole Foods, and oh, it was a great idea. 


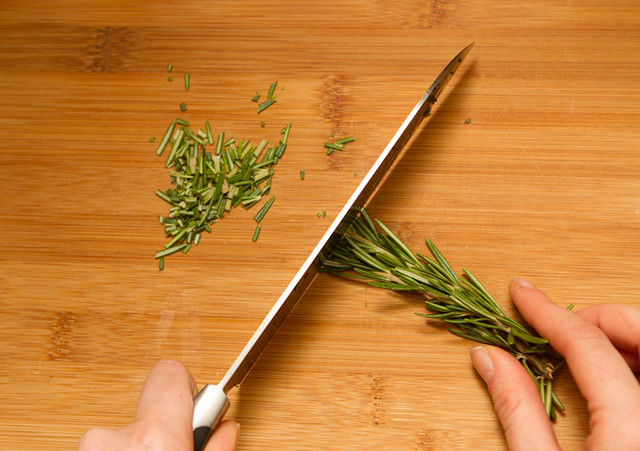
First, grab your rosemary and chop it up as fine as you can. I chopped about two sprigs.


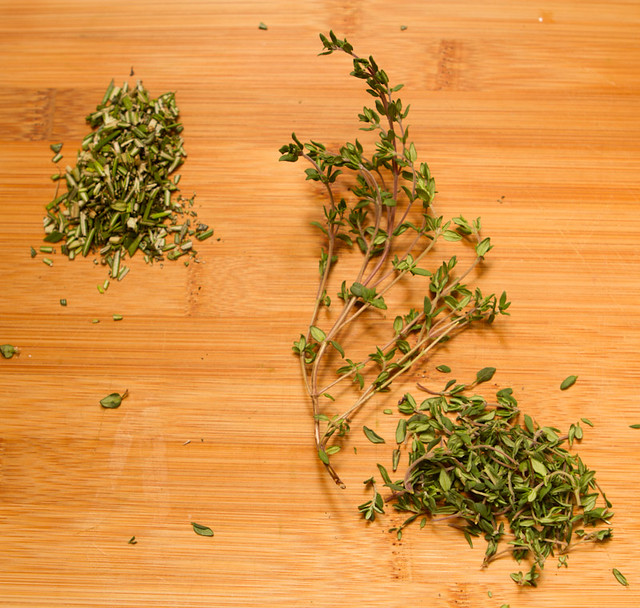
Next, chop your thyme, I did 2.5 sprigs about this size.


Next chop 5-6 cloves of garlic, and one big sprig of mint. Chop the garlic finer than I did here, I went back over these a bit. Combine all of these in a small bowl with your salt and pepper. 


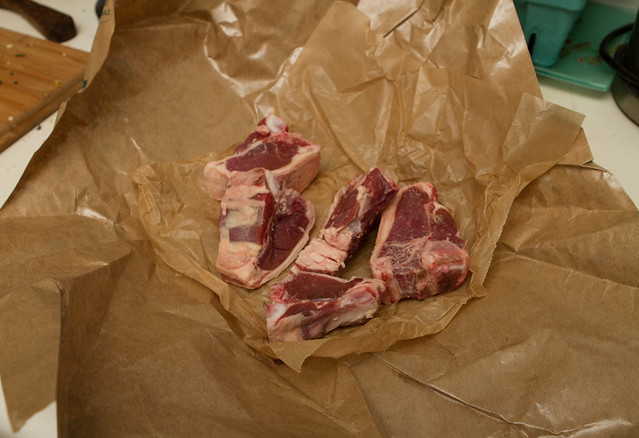
Unwrap your chops. Delicious! Look at that delightful lamb fat.


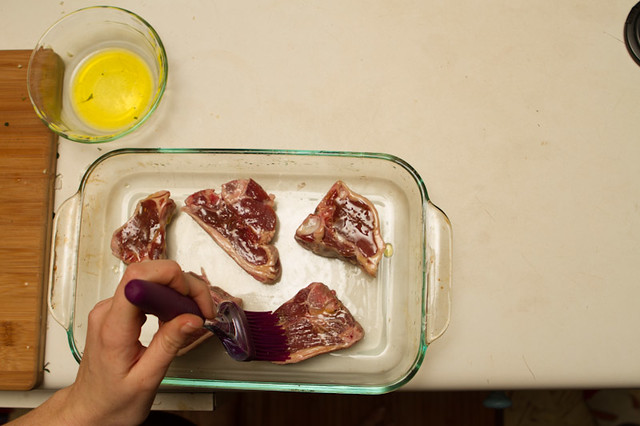
Baste with some olive oil


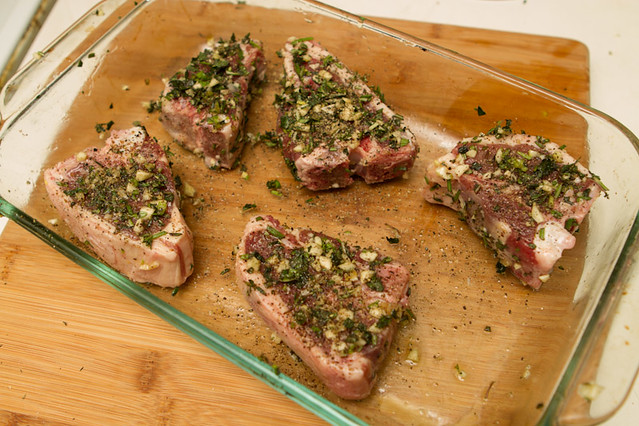
And rub down with your herb mixture. I grated a bit more pepper over top too. I like extra pepper though.


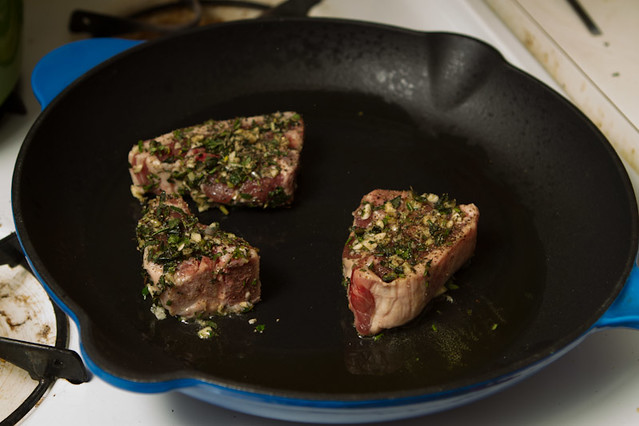
Heat up some olive oil in a pan, and toss them in to brown. Please disregard the state of my stove top. It’s always looked like that (…kind of…)
Then into the oven they go, they only need about 4 minutes on each side to reach a nice medium-rare.


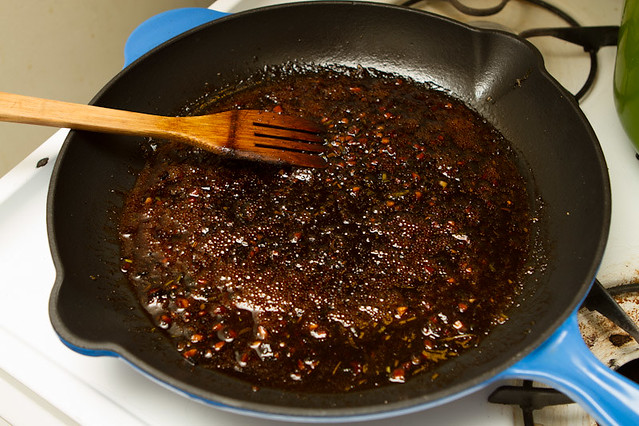
When the lamb chops come out, put them on a plate to settle, and pour your balsamic vinegar and honey into the pan with the lamb drippings and herbs. It'll bubble and boil a lot, so just keep stirring until it starts to thicken. Keep in mind it'll be thicker cool than hot, so stop before it gets too syrupy.


Recipe: 
Serves 2

1 lb Lamb Loin Chops
3 Tbsp Olive Oil
2-3 Sprigs Fresh Rosemary finely chopped (or 1-2 Tbsp dried rosemary)
2-3 Sprigs Fresh Thyme finely chopped (or 1-2Tbsp dried thyme)
1 Sprig Mint, finely chopped (or 1-2Tbsp dried mint)
5-6 Cloves Garlic, finely chopped
1 Tsp your favorite salt (I used smoked salt but anything from kosher to volcanic would be fine)
1 Tbsp Ground black pepper
1/4 C Balsamic vinegar (the more aged and sweeter the better)
1-2 tbsp Honey

 Chop the herbs very fine, once you think they’re fine enough, chop some more. Don’t judge by my photos of minced herbs, I chopped more after taking those. Combine the chopped rosemary, thyme, mint, garlic, salt, and pepper in a small bowl and set aside. 

Take out your lamb loin chops and place them on a baking dish or a plate (you won’t be cooking them on this, so don’t worry about what it is), Brush with about 1-2 Tbsp olive oil, until you’ve brushed each side of each lamb chop. Next rub your herb mixture onto all sides of your lamb chops. Set aside any extra herbs. Now, if you have the time, let these sit 30 Minutes - 1 hour. I did not have time, but you should try it as the herb taste will really sink in.

After marinading preheat the oven to 400 degrees Fahrenheit, and pour your remaining 1-2 Tbsp love oil into a oven proof skillet (I love cast iron), heat to medium-high, and add the lamb chops, browning each side (about 2 min per side). If you have extra herbs from the rub, throw them on the lamb just before putting it in the oven. Place the whole skillet in the oven on the center rack. Cook for 4 minutes, flip the lamb chops, and cook another 4-6 minutes depending on your preference for medium-rare or medium chops. I cooked mine a total of nine minutes and they were a perfect medium-rare.

For the glaze, remove the chops from the pan and set aside for a moment, leaving all drippings and juices in the skillet. Pour in your vinegar and honey, and return to a medium-medium high heat, which will begin to boil, probably immediately, stir it around a bit the whole time, until it starts to thicken and recue, about 2-3 minutes. Once the lamb chops are served, spoon the reduction over the chop on your plate. Be sure to get some of the delightful burnt herb bits with it. Heavenly.

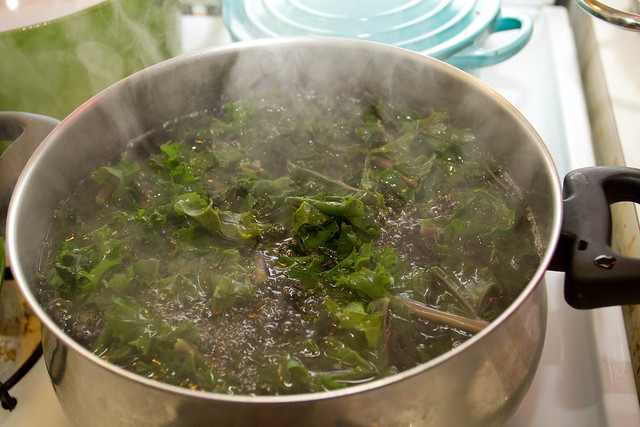
Serve these up with some baked sweet potatoes (a great accompaniment for this as they also bake at 400 degrees, just stab them full of holes and throw them in an hour before everything will be ready), and some wilted collard greens- aka my favorite side dish ever, for a perfect weeknight dinner.


Share on Tumblr

Homemade Butter-


My mother is an elementary school teacher, and consequently a fantastic reader of stories. When I was  a very young child she read my brother and me Little House in the Big Woods, and I was fascinated by Laura Ingalls' descriptions of pioneer life. I went on to read and recently reread the whole series, and on my second time through I was engrossed by Laura's descriptions of how to make and do things. How to build a latching door without the use of any metal, how to make and age cheese, how to safely dig a well, how to make and form butter. 
I'm interested in the idea of making more things. S and I make as much as we can, but some elements always seem to have to be bought in Manhattan. I don't have a cow to milk, so I had to buy the cream for this recipe, and I don't have a butter churn, but I do have a food processor! 


Homemade Butter Recipe:
This recipe is for unsalted butter, but if you want to make salted, simply add a dash or two of salt.

1 qt. Heavy Cream (I used grass fed for more nutrients)

Pour heavy cream into food processor (or a standing mixer, or a bowl and use a hand mixer), put the lid on and turn on, my food processor only has one speed because it is from the 1970's, but if you have choices, go with medium. You'll need to run it for 7-9 minutes. 

The cream will thicken, start to look like whipped cream, then like creme fraiche, then it will begin to pull apart and look curdled- you will think it's almost ready now, so don't get upset when it gets liquid-y and smoother again a second later because now you really are almost there. When it's about ready the fat solids will suddenly separate from the liquids and there will be a squelching sound, if you're using a hand mixer with an open bowl be careful of splashing now. 

After the fat solids pull apart it'll look like wet, kind of granulated butter. Turn off your mixer, place a mesh strainer (or a strainer lined with cheesecloth) over a bowl and pour the contents of the food processor in, you may need to do this part in two batches, depending on strainer size.

Using two wooden spoons, cheese paddles, or two spatulas (I used one wooden spoon and one spatula) press the butter into solid forms then press into the stainer (not so hard that butter forces through the holes, just enough so the liquid drains out), continue to do this, turning the lumpy butter forms over after each press, until they start to resemble store bought butter in the consistency, fairly firm. Mold them into balls, or other desired shape, and you're ready to go. Should last two weeks in the fridge.

This butter is amazing on toast, in homemade caramel, or bring it to room temp, pop it back in the stand mixer with some diced herbs and make compound butter. Delicious.

Share on Tumblr

Kale and Arugula Pesto with Pasta and White Beans


Kale- S and I eat a lot of it. In early spring, when most of the winter vegetables are gone from Whole Foods but the spring harvest has not yet begun Kale is one of the easiest vegetables to find domestically grown. To mix it up from our usual wilted kales, I wanted to try a kale pesto, but I had some arugula leftover from a salad the night before as well, so this became a mixed green salad. You could substitute the arugula for spinach, more kale, beet greens, dandelion greens, or just about any other flavorful green. Forewarning, this recipe does require a food processor. Some substitutions are at the bottom as well.


First, blanch your Kale in some boiling water for 2-4 minutes


While your water is heating up, throw some Parmesan cheese in your food processor. Throw in extra, you'll need some for topping your pasta too.


Whirl it up.


When you have this, pour the Parm (or Romano, or Asiago) into a bowl and set it aside for now.


Toast up your Hazelnuts in a frying pan over low heat (don't be like me and walk away from them so they end up a bit overcooked)


Toss your arugula in the food processor.


Basil (all pesto needs basil)


Add the kale


And the cheese.


Toasted Hazelnuts as well.


Lastly, add a healthy drizzle of olive oil, and a squeeze of lemon.


And whirl it up into a paste. How even and smooth you like your pesto is up to you, I like mine a bit rustic and grainy. 


Now the very easy part. If you don't want to make pasta, stop here and put your pesto on whatever you would like, but I had mine on whole white pasta and great northern beans. Boil your pasta water and toss in your pasta of choice (I went with little fusilli)


Open your can of beans and rinse well.


Combine your pasta and beans on your plate. I like a higher ratio of pasta to beans, but that's up to you.


Add your pesto, another healthy drizzle of olive oil, and fresh grated pepper and salt. 
Devour immediately. 


Recipe: 
Adapted from The Kitchn's Winter Greens Pesto recipe.

Pesto:
1/3 C Roughly chopped Hazelnuts
6 oz Kale, rinsed and chopped (I use curly kale)
4 oz Arugula 
4 oz Basil
1/2 C Extra virgin olive oil
1 C grated Parmesan cheese (plus extra for topping)
Juice of 1/2 a lemon 
1 tsp salt
1 tsp pepper

White Beans and Pasta:
1 lb pasta (I like whole wheat fusilli)
1 15 oz Can of Great Northern white beans


Boil a large pot of water, add kale to blanch, 2-4 minutes then remove and drain kale.
Start a second large pot of water boiling for pasta, add pasta and cook normally when water boils. 
While water boils, put your Parmesan cheese in the food processor and blitz until grated pretty fine. Remove from food processor and set aside.
 Place hazelnuts in a heavy (cast iron is ideal) frying pan and toast over low heat until golden brown, remove and set aside. 
Add arugula, basil, drained blanched kale, hazelnuts, 1 C Parmesan, lemon, salt, pepper, and olive oil to food processor, and blitz until pretty smooth texture, or until it achieves your preferred pesto texture.
Open can of Great Northern beans, drain and rinse thoroughly. 
Combine pasta and beans on plate, top with pesto, a drizzle of olive oil, extra Parmesan, salt and pepper. 


Substitutions:

Arugula- beet greens, dandelion greens, spinach, any spicy green
Parmesan- Asiago, Romano, Dry Jack, any hard cheese
Hazelnuts- Walnuts, Pecans, Almonds

Share on Tumblr